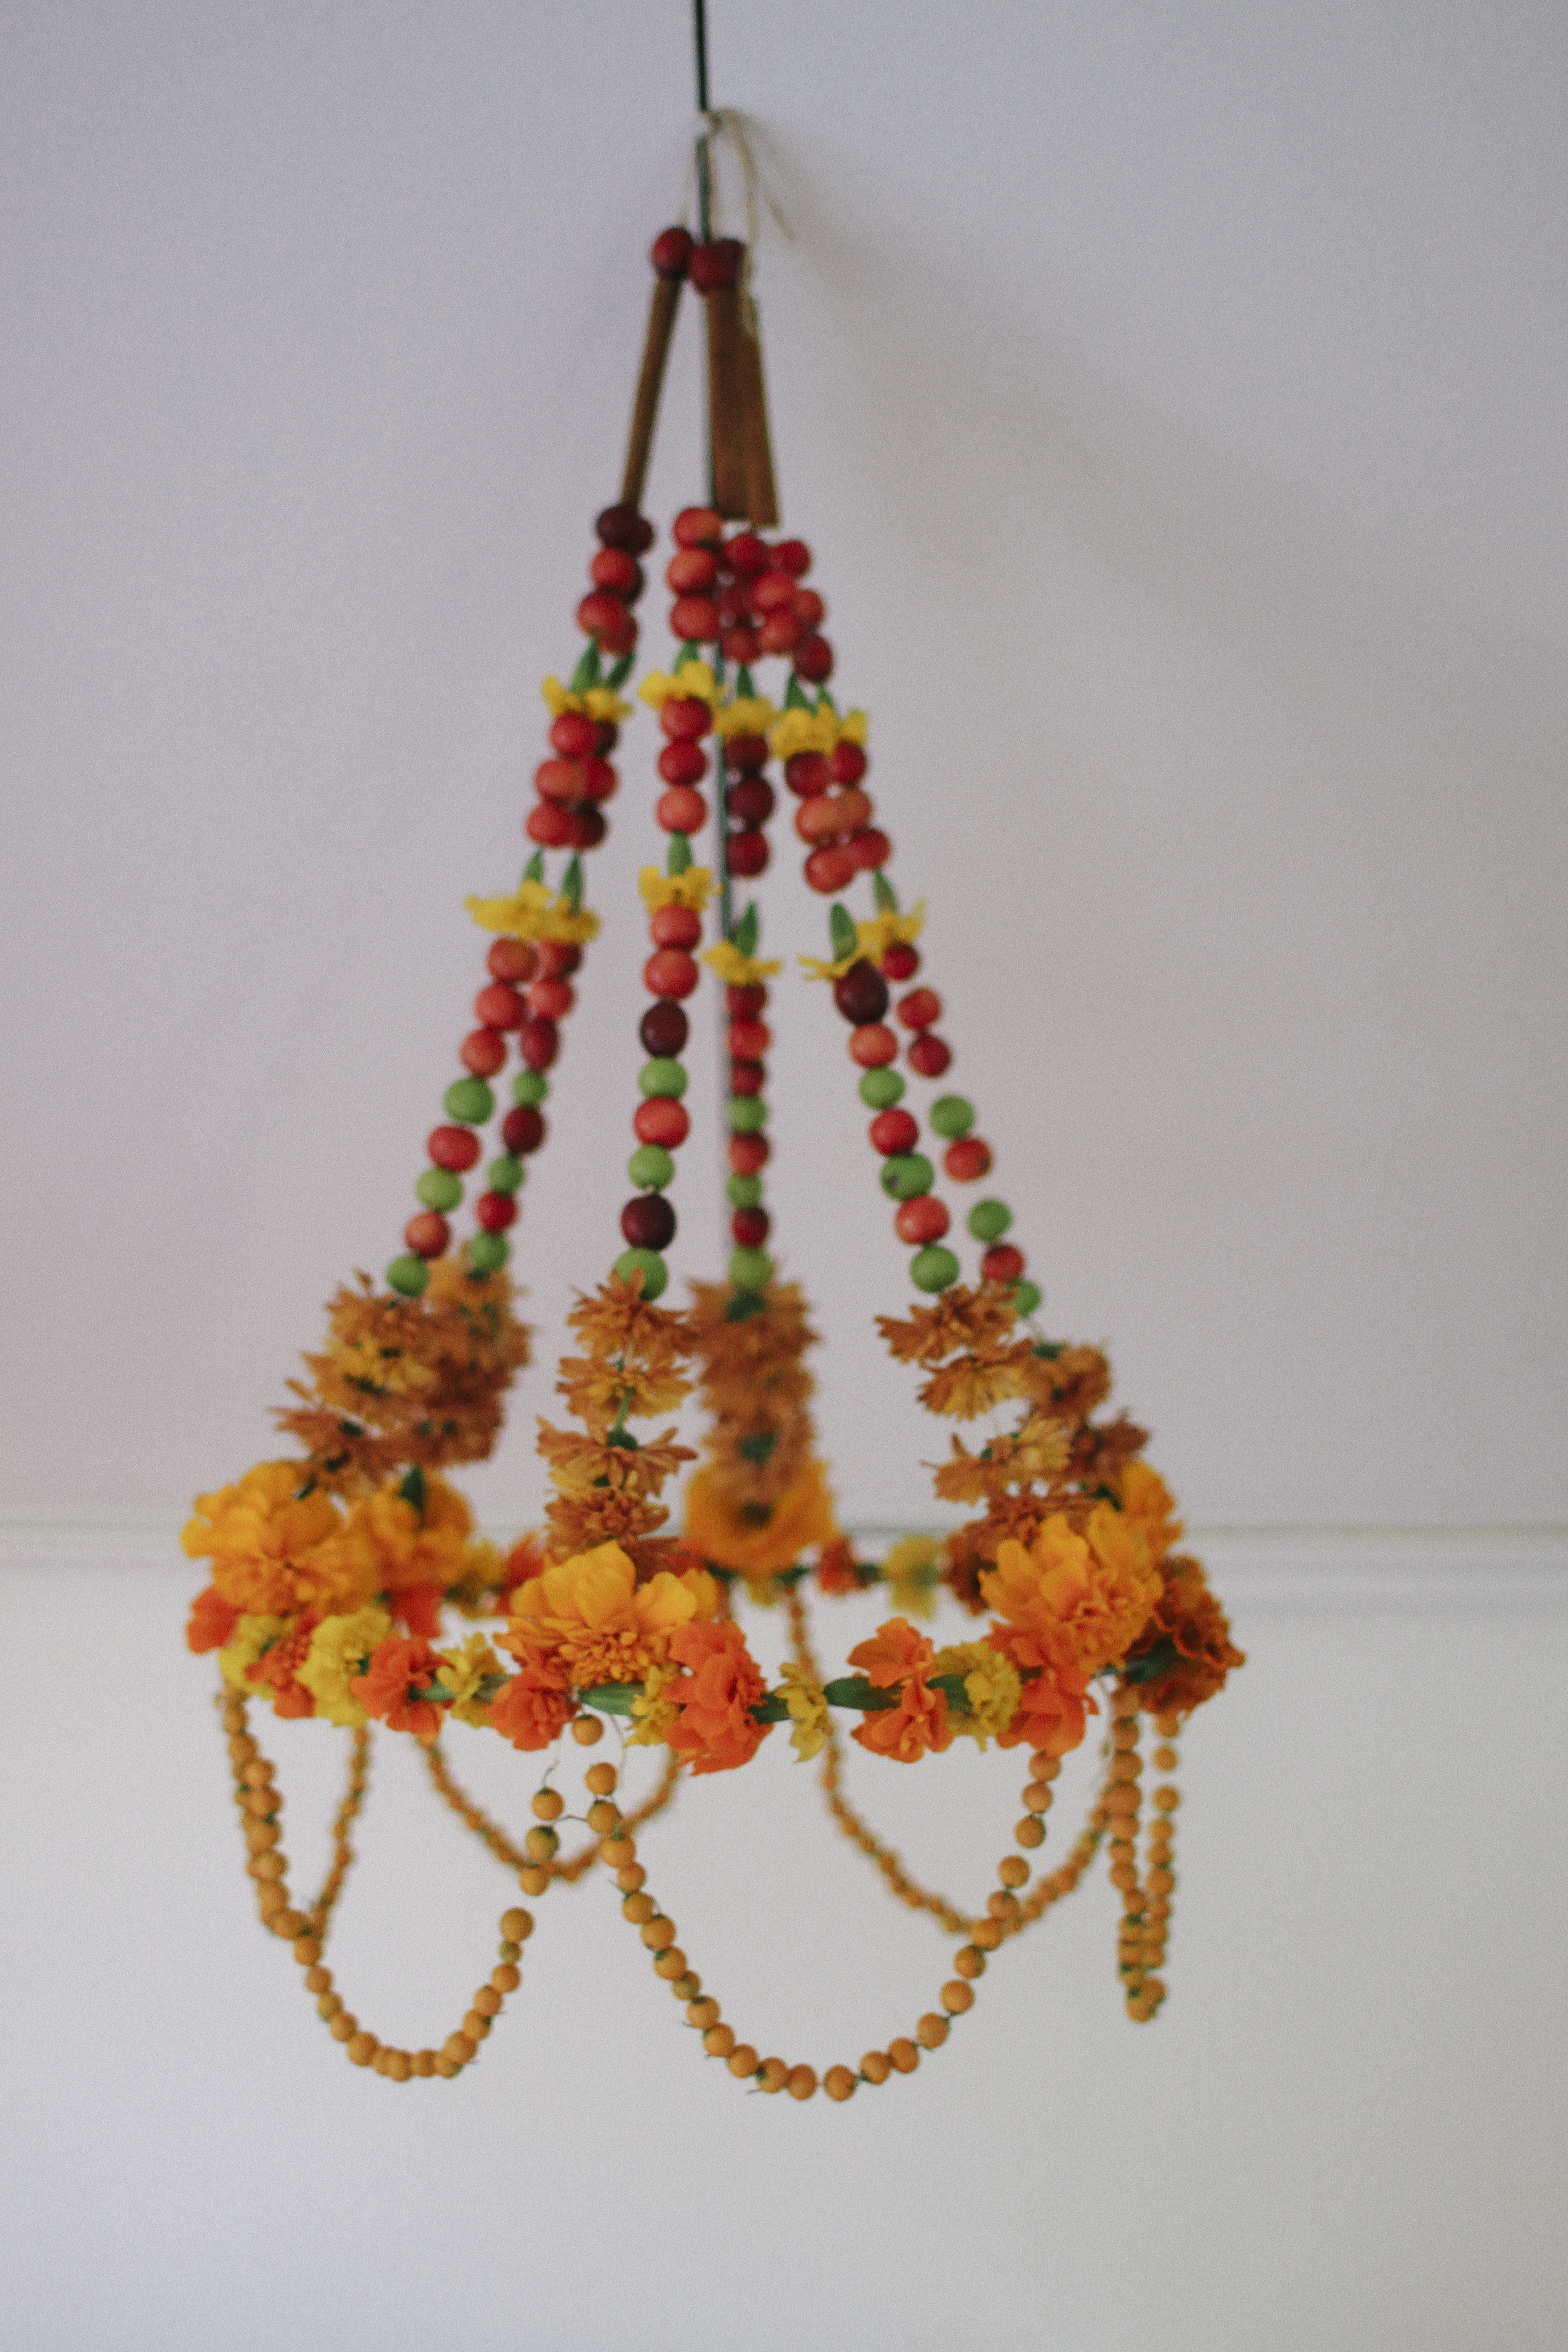
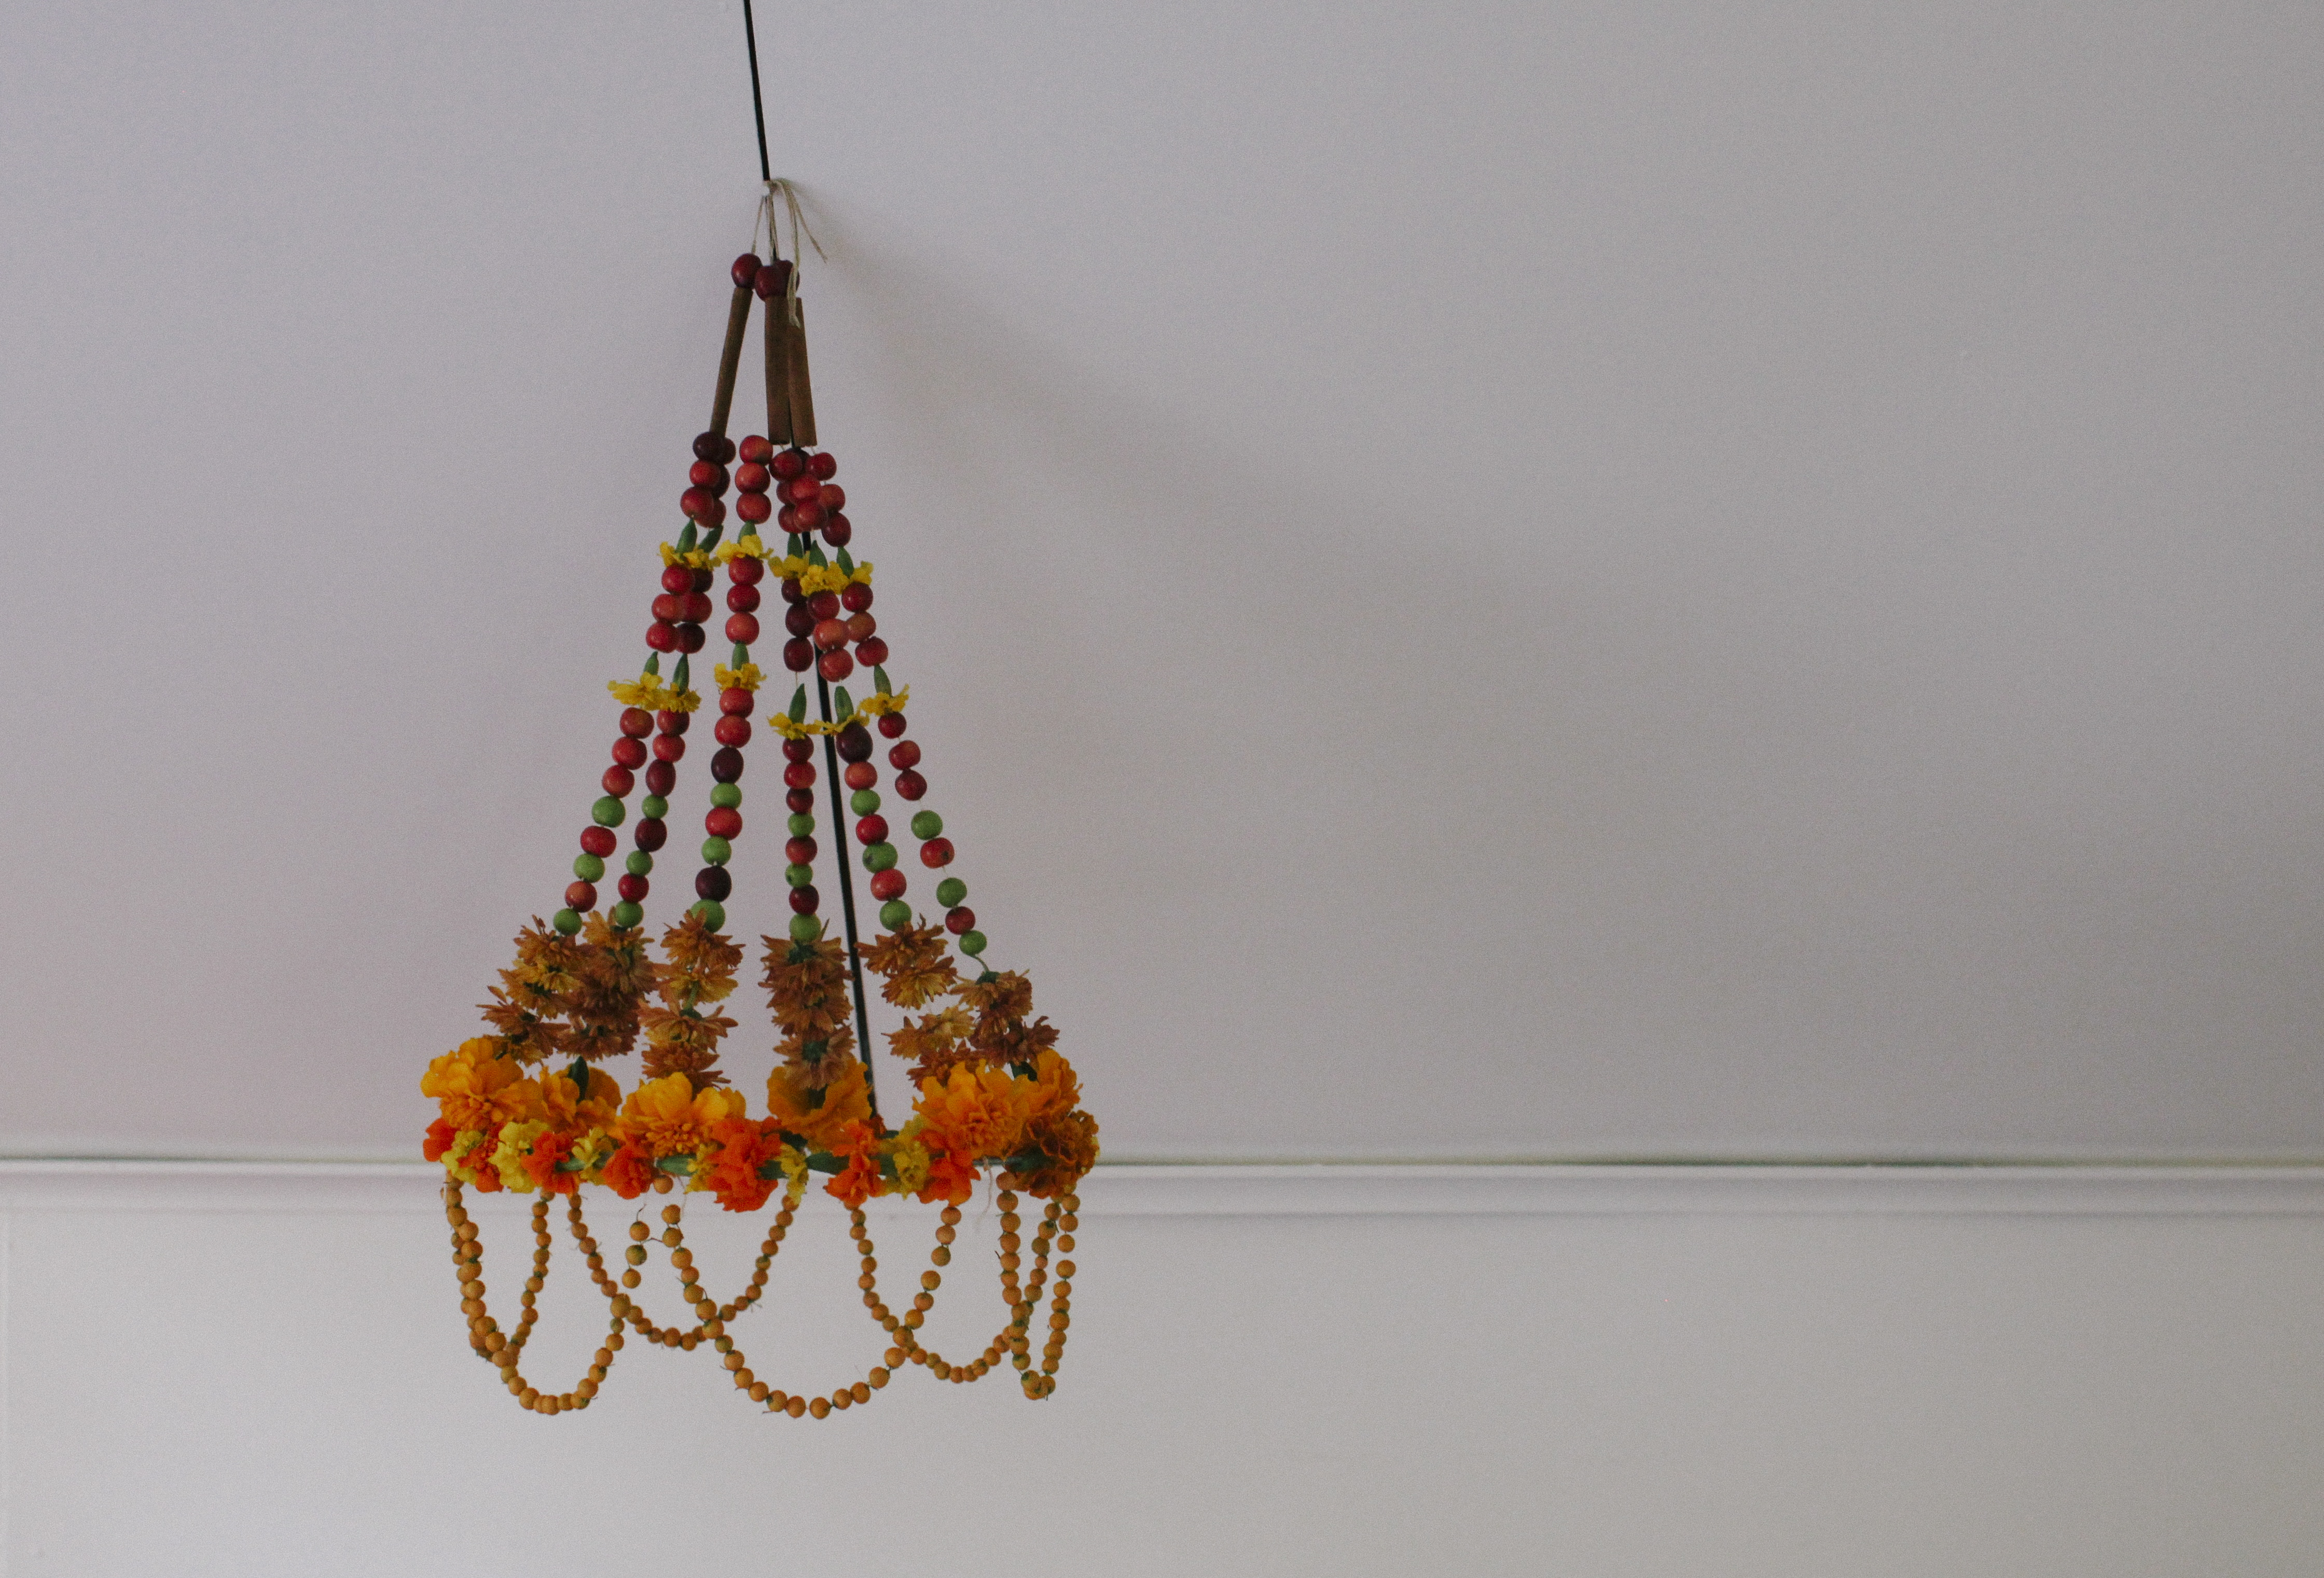
Polish Pajaki have caught my attention over the years, and I have periodically thought of making one. What is traditionally a paper flower and straw chandelier, that translates to mean “spiders of straw” I have appropriated with my love of fresh seasonal flora.
For those of you curious to know more, Pajaki are a Polish folk art decoration. This tradition is particularly strong in the Lowicz region of Poland, located about 50 miles outside Warsaw. In the winter time when many hours are spent indoors, paper cutting became a popular folk craft. Polish families would create elaborate and details paper cutouts to decorate the walls and ceiling of their homes for Christmas and Easter. The wall decoration is called wycinanki and the ceiling decoration is called pajaki.
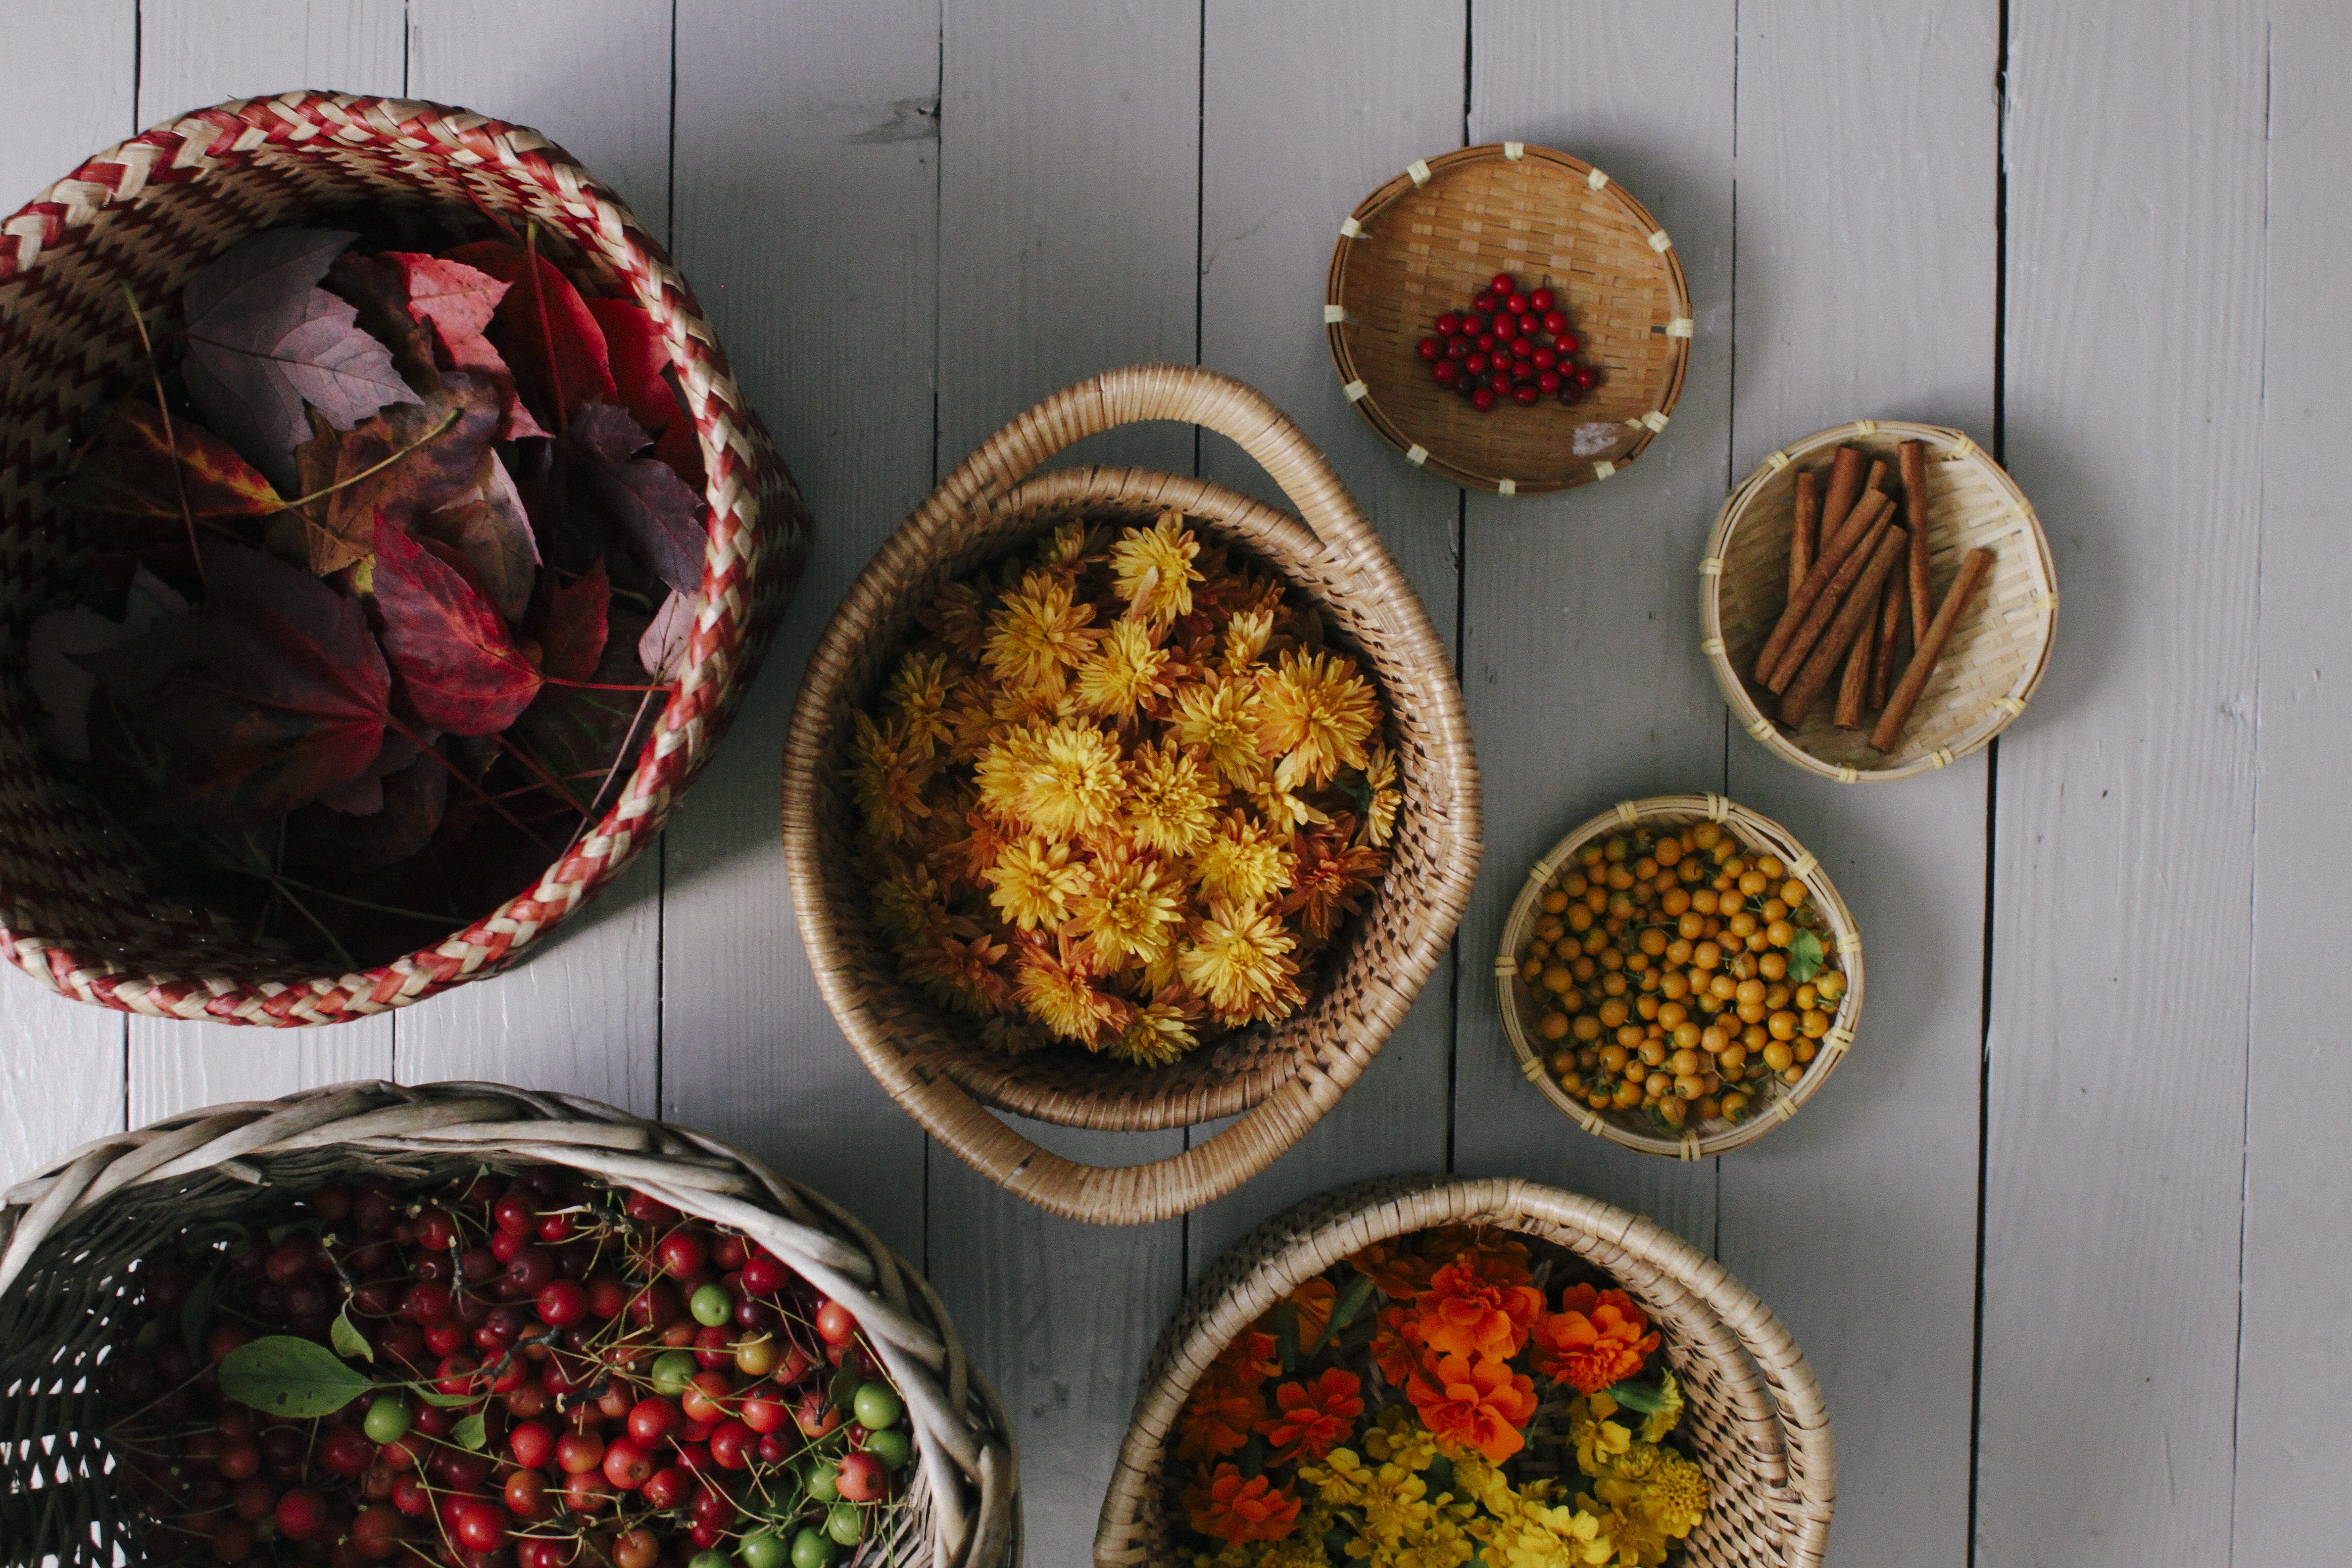
As I said, pajaki are traditionally crafted using colored paper and straw, but I had my heart set on making one from fresh flowers and berries and whatever else I could forage. I searched around the internet to see if I could find other examples of fresh flower versions, and could not, so I was just went for it, working it out as I went. It was simple enough to do, it just took time and patience.
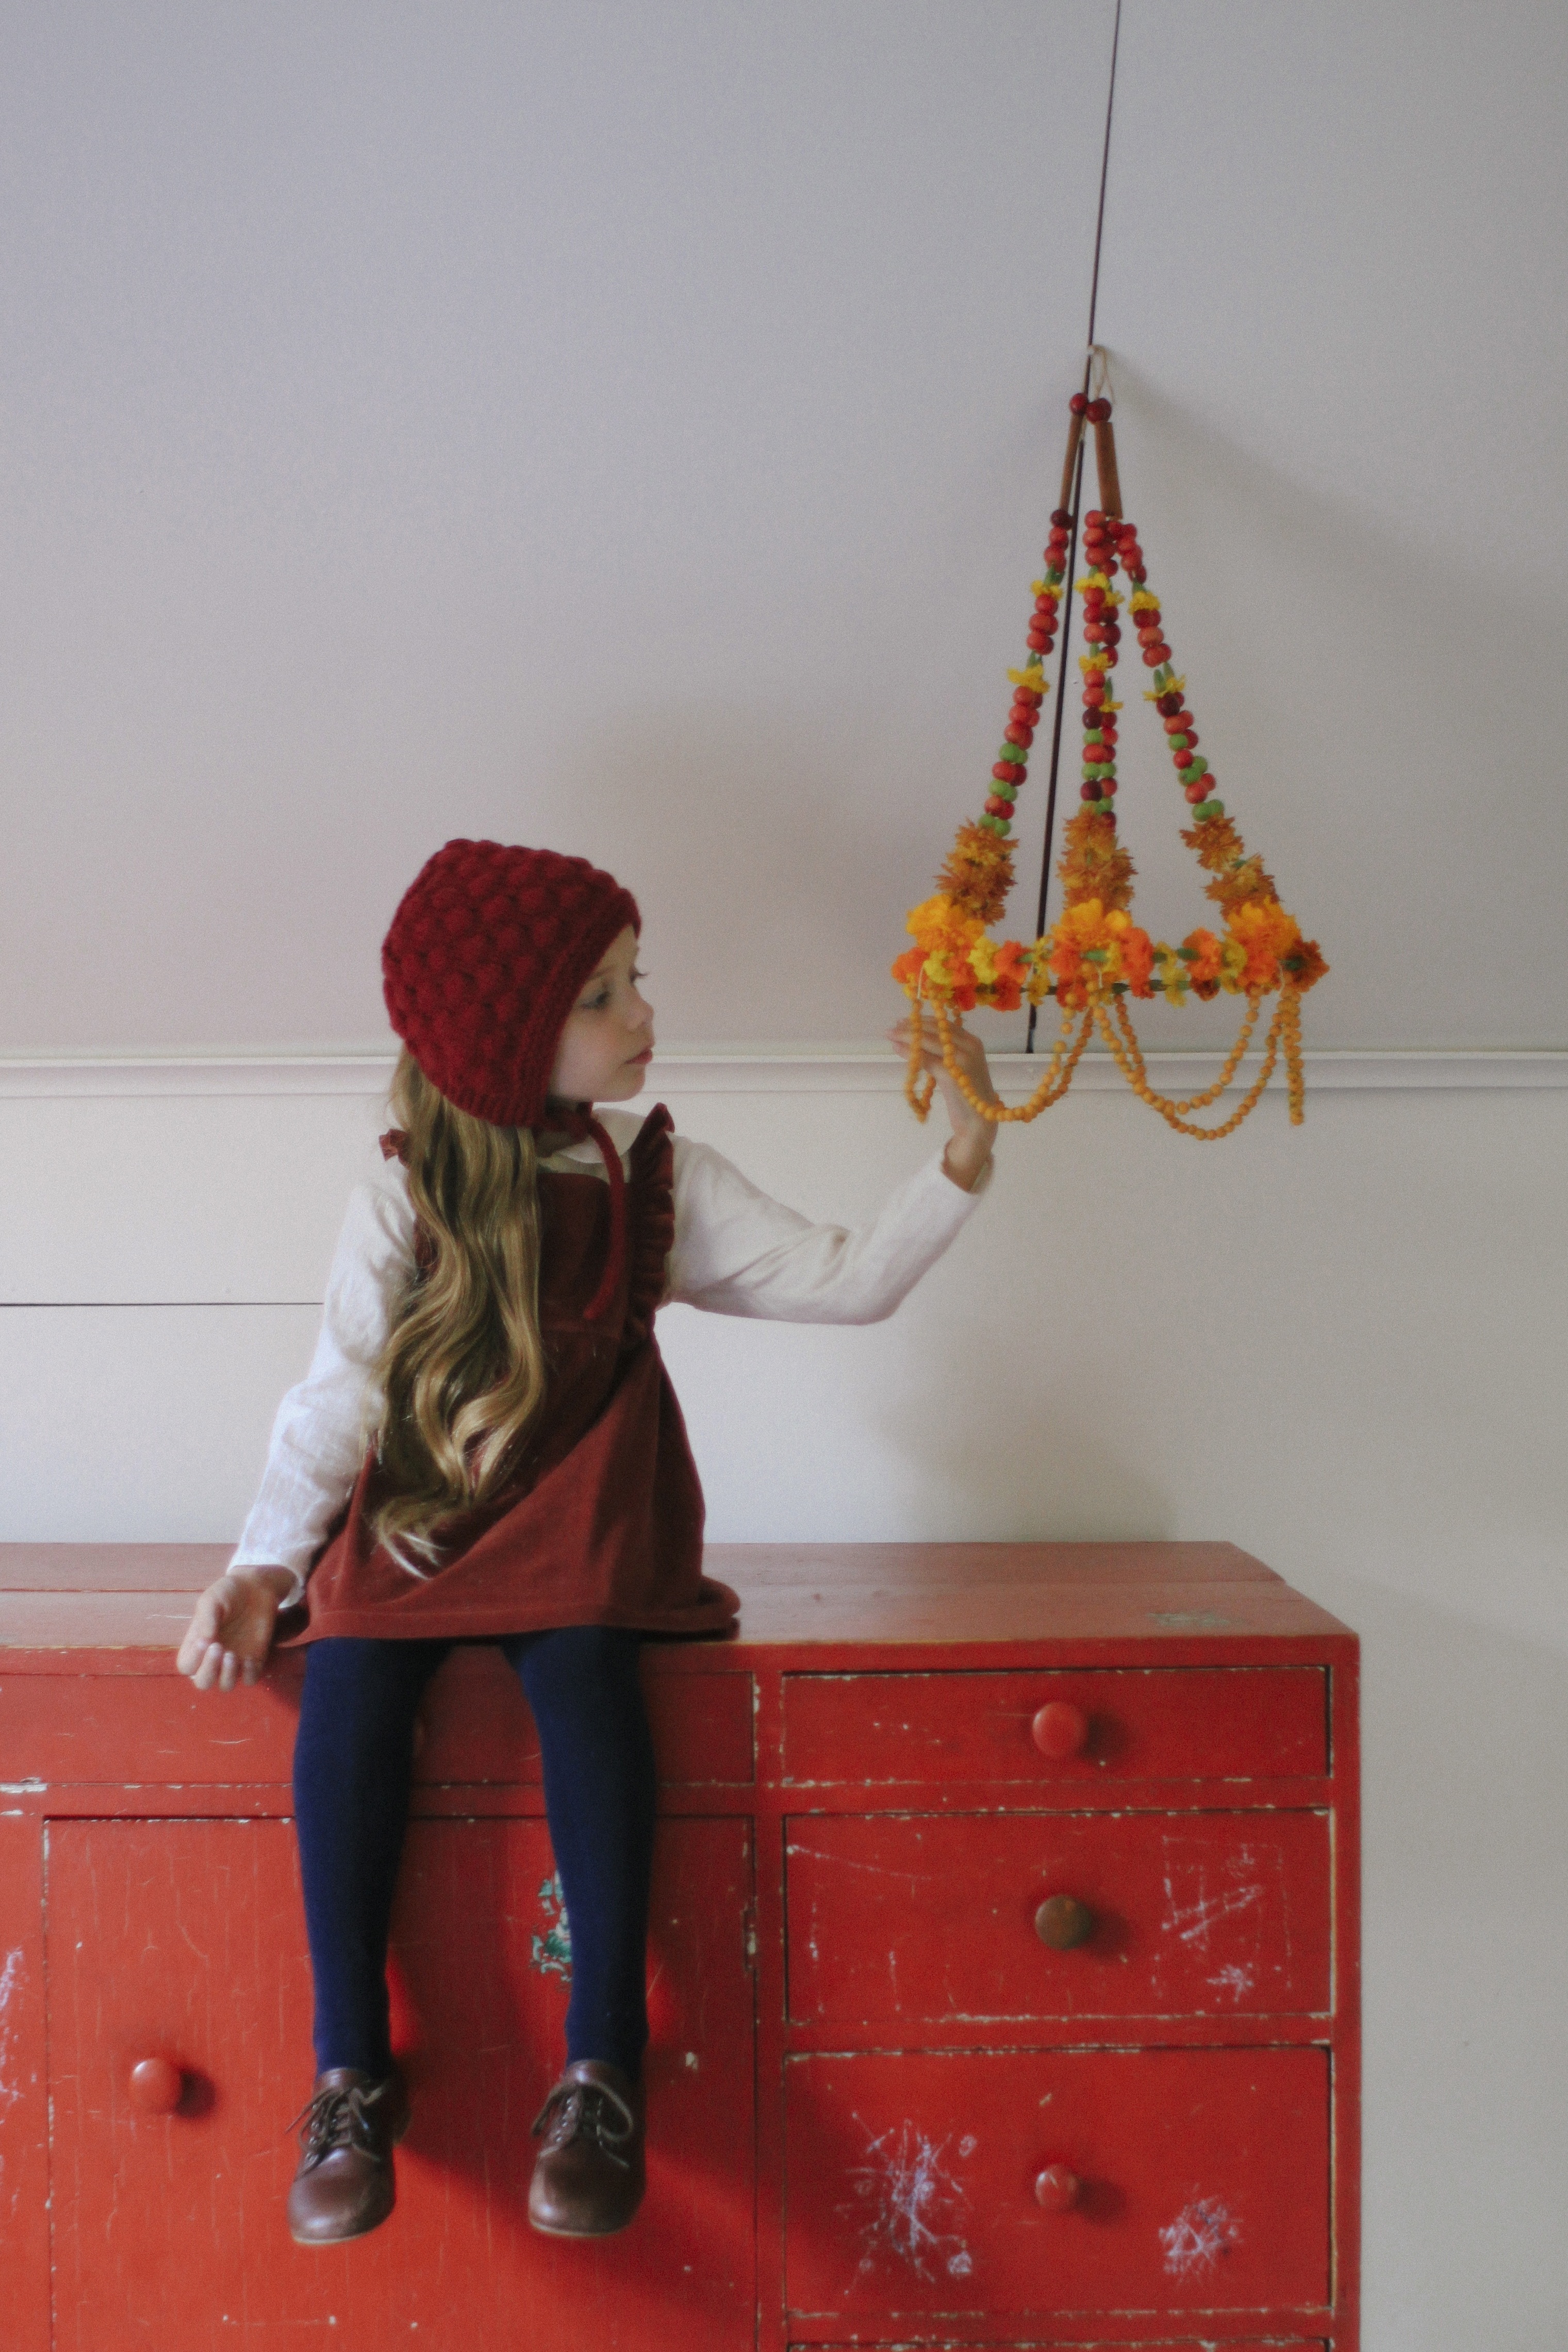
This is a special occasion decoration as it is a lot of work given it does not last long with fresh flowers. I have to say though, that this week I have enjoyed watching it dry out, and while it was beautiful and vibrant while fresh, I love the more muted colours now it is dried too. I think it will make a festive christmas decoration.
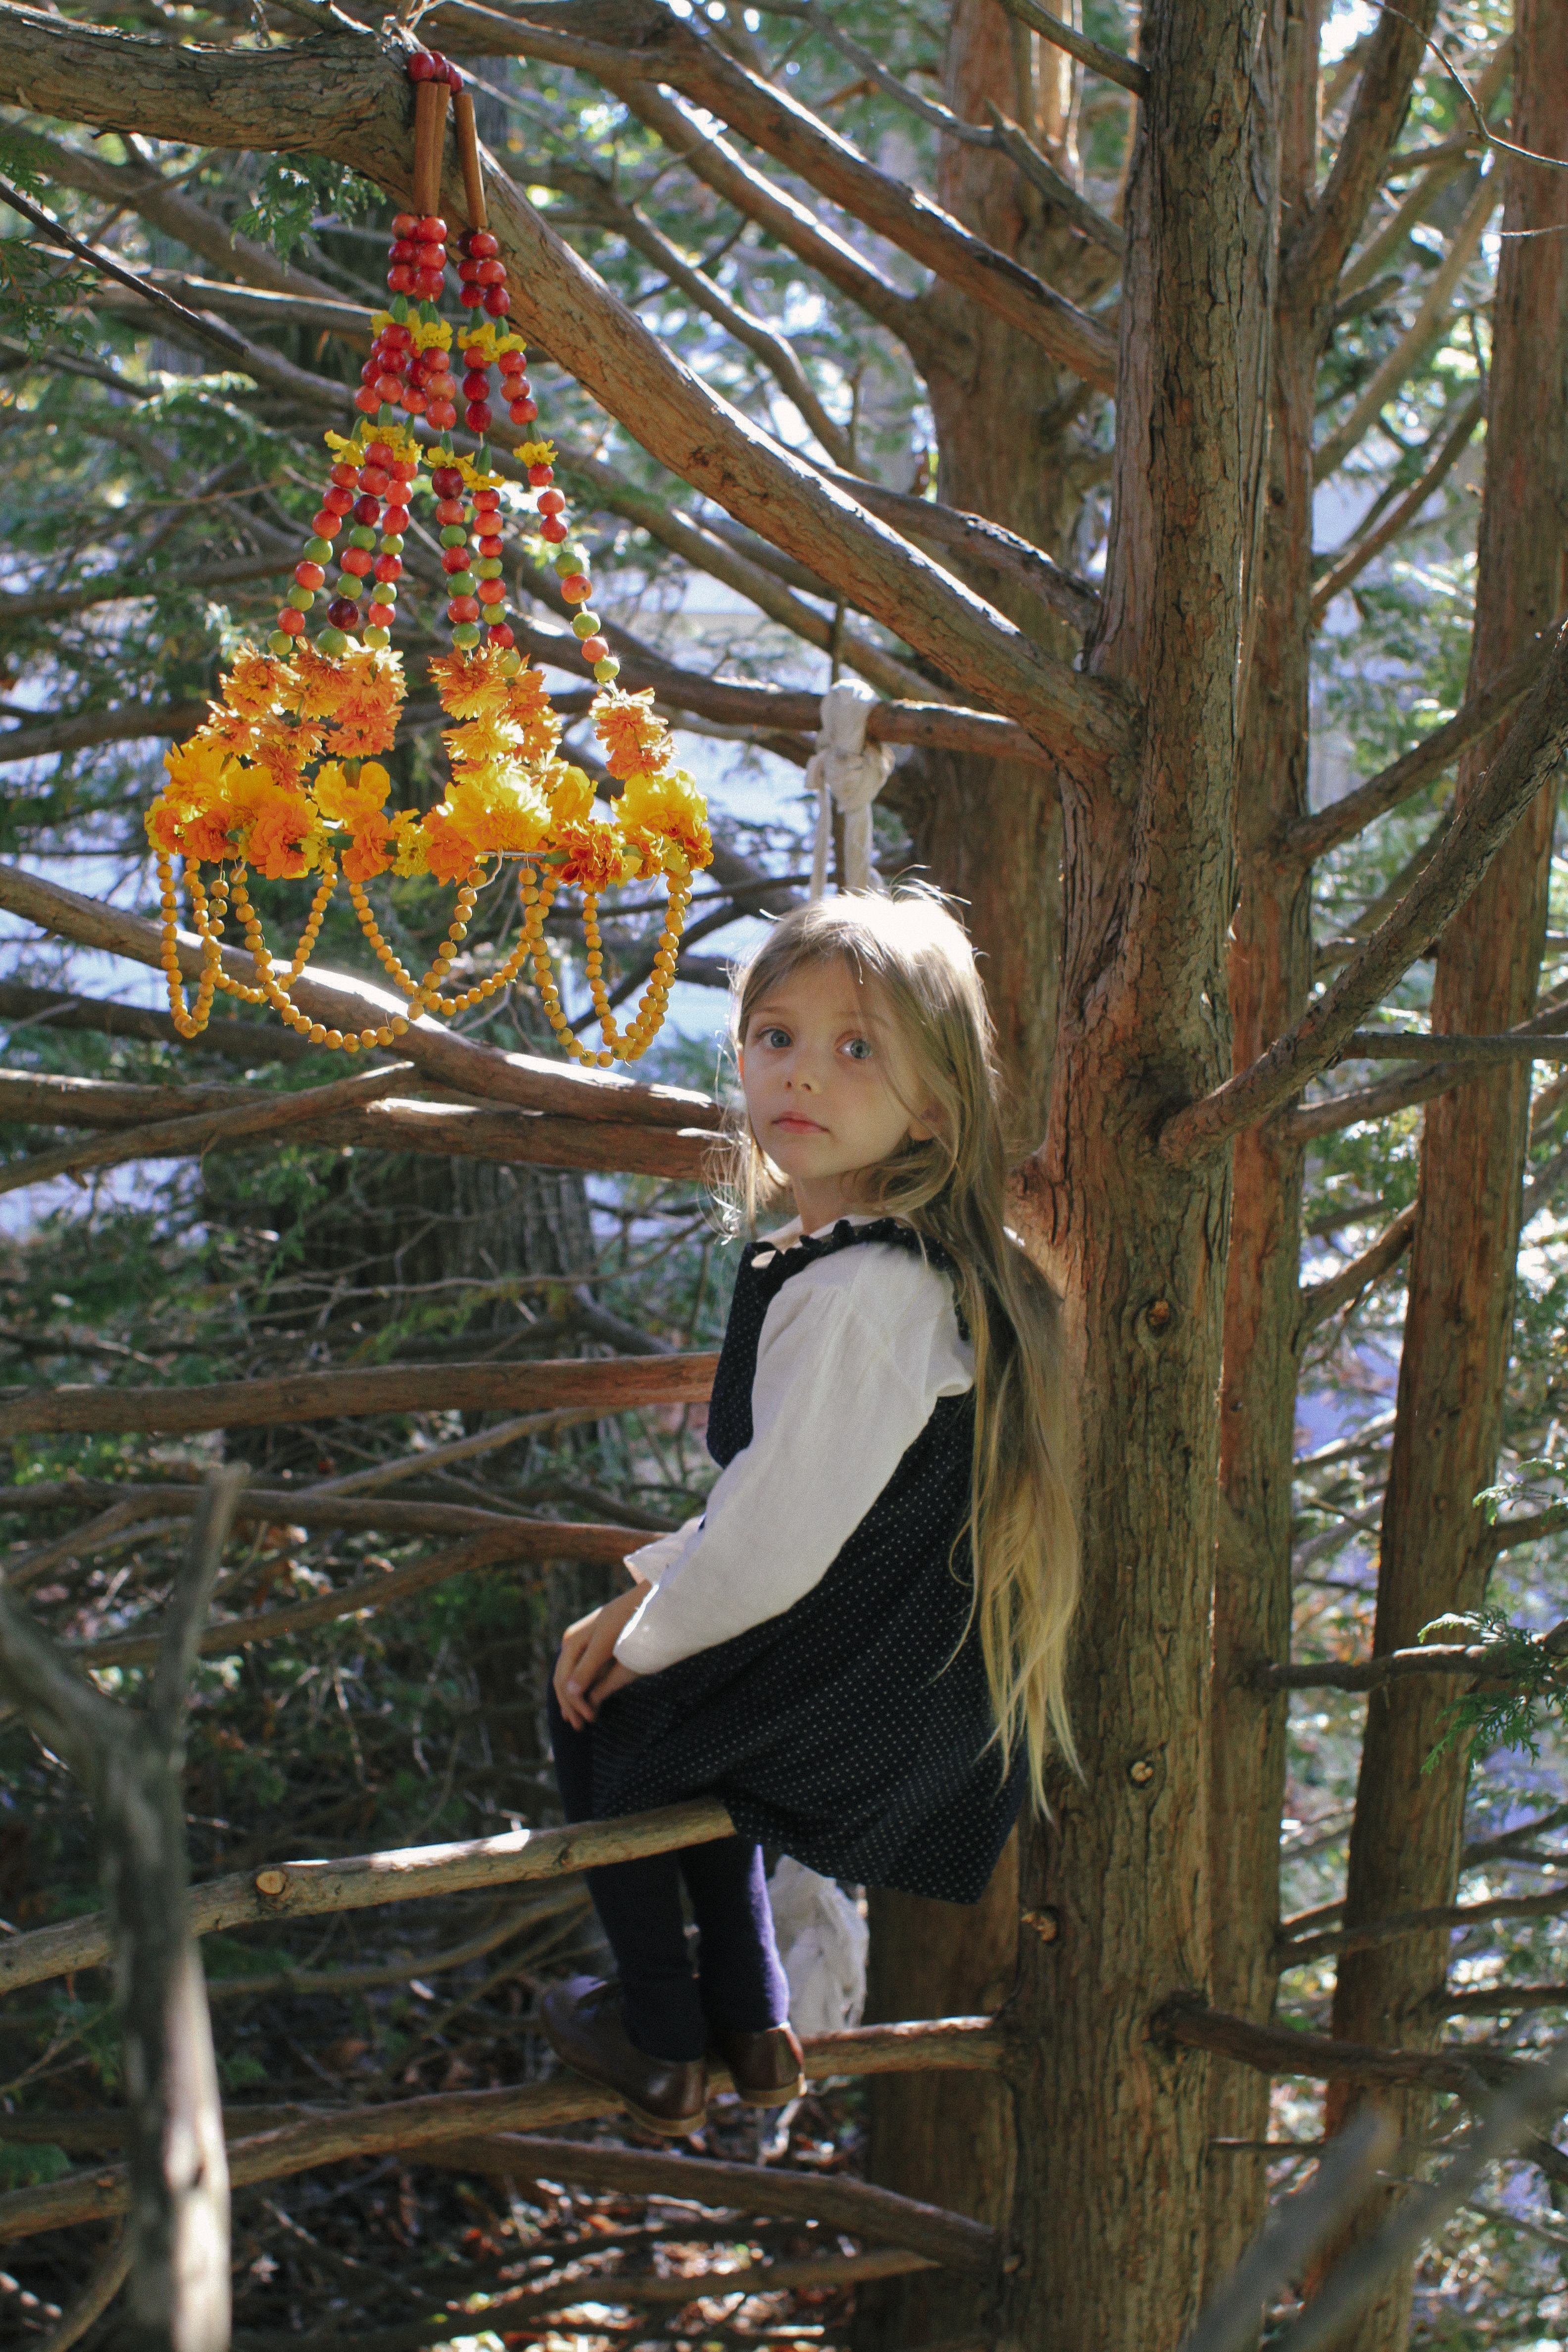
Elle was intent on hanging it in their tree house and she climbed up the tree and had me pass it to her. I really liked how it looked hanging in the tree. It set my imagination alight with a large fresh white and pastel flower version for an outdoor wedding. Endless possibilities! i hope you are inspired friends!
Materials
Wire Circle (old lamp shade)
String
Needles
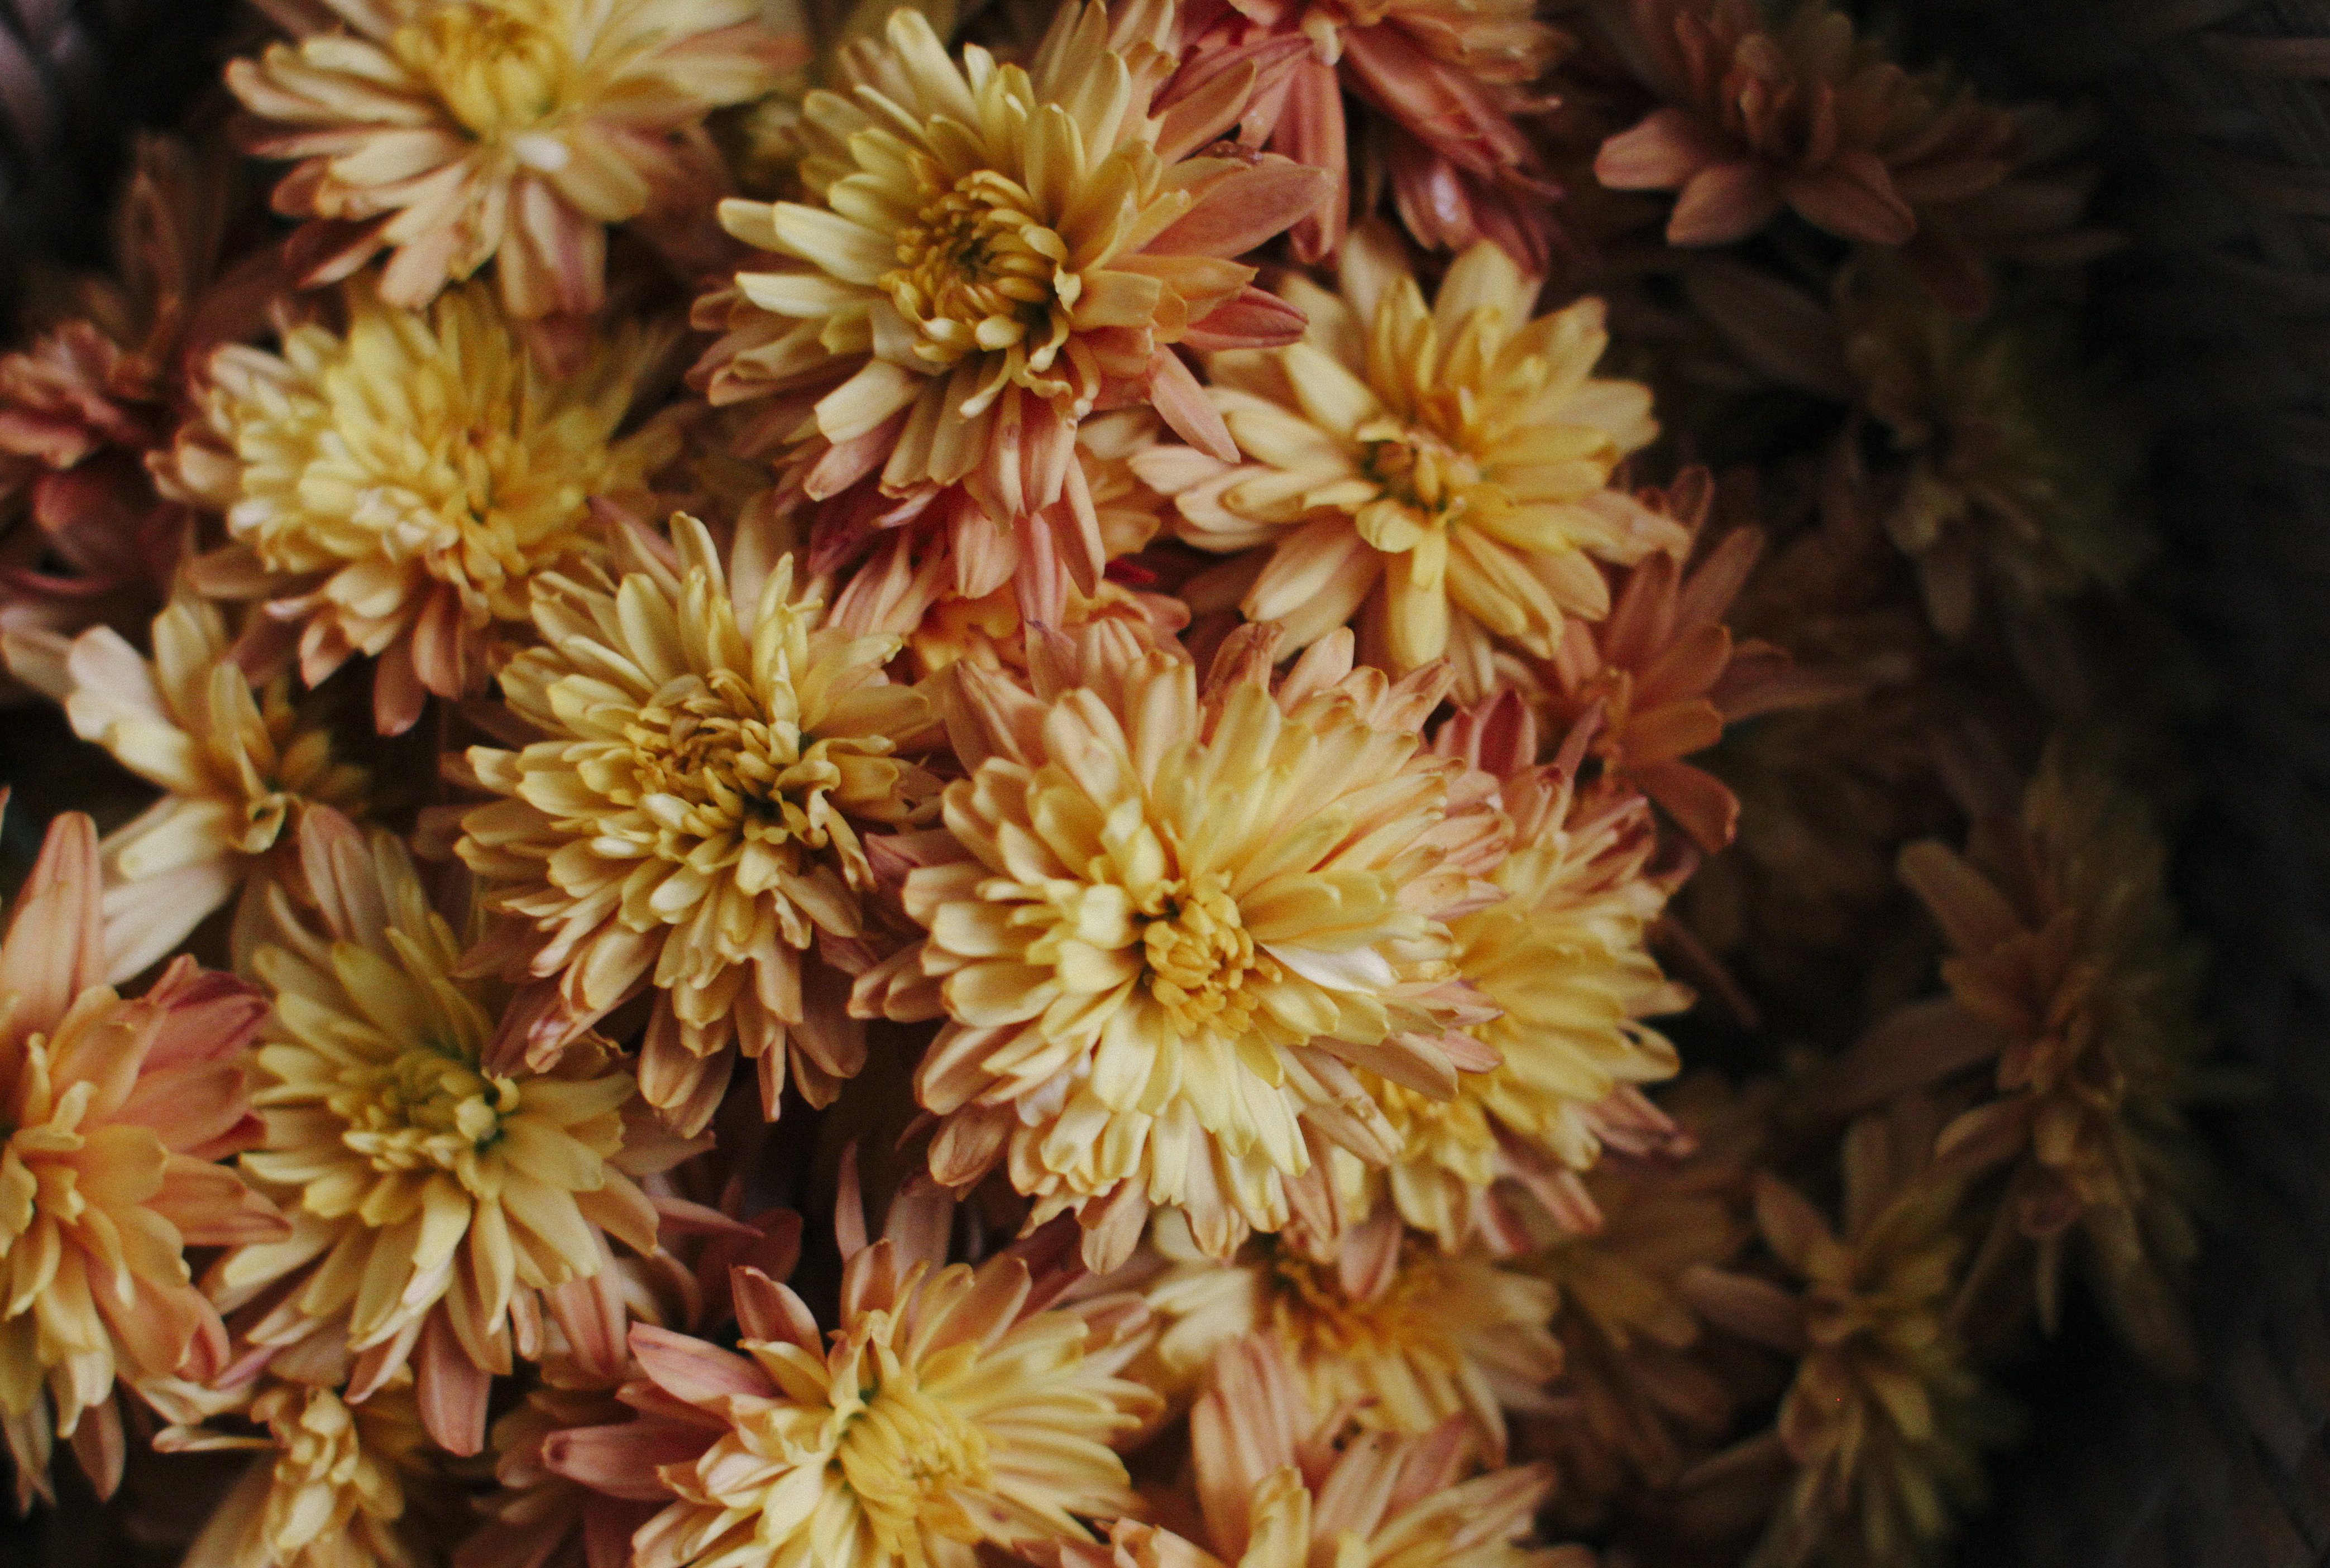
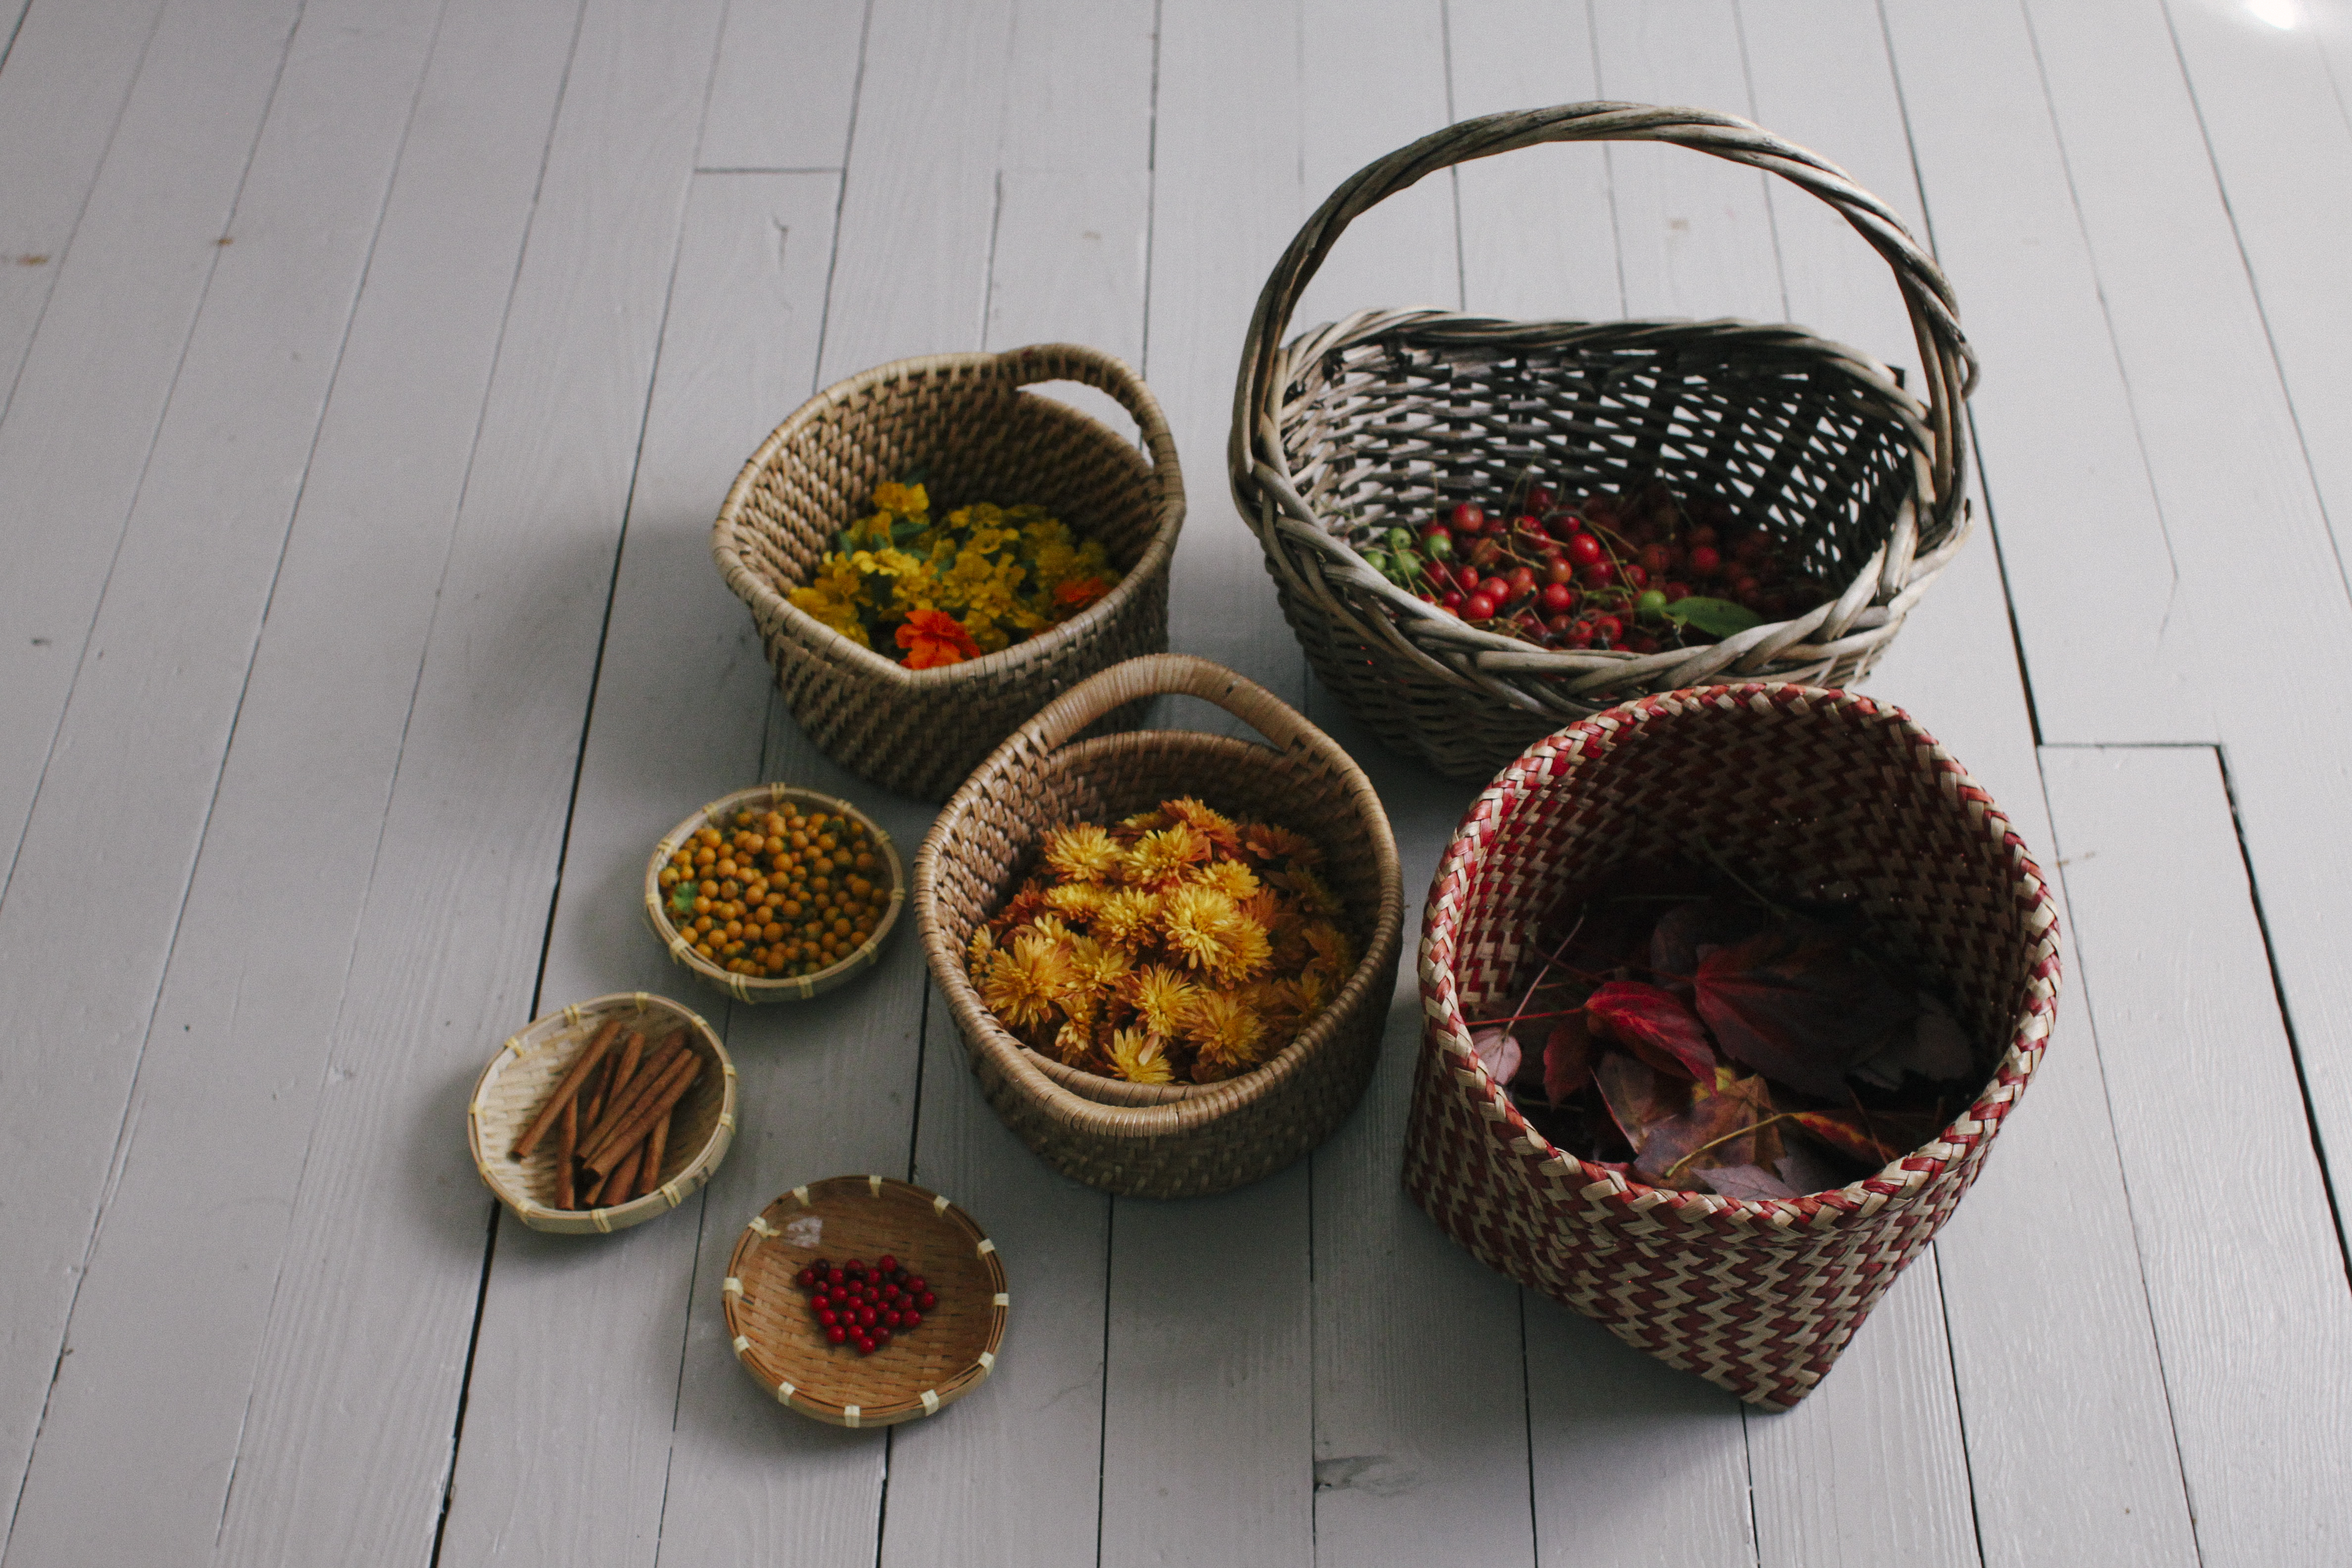
Foraged and gathered supplies (flowers, berries, crab apples, cinnamon sticks etc)
Method (Project time about 3 hours, excluding foraging and gathering).
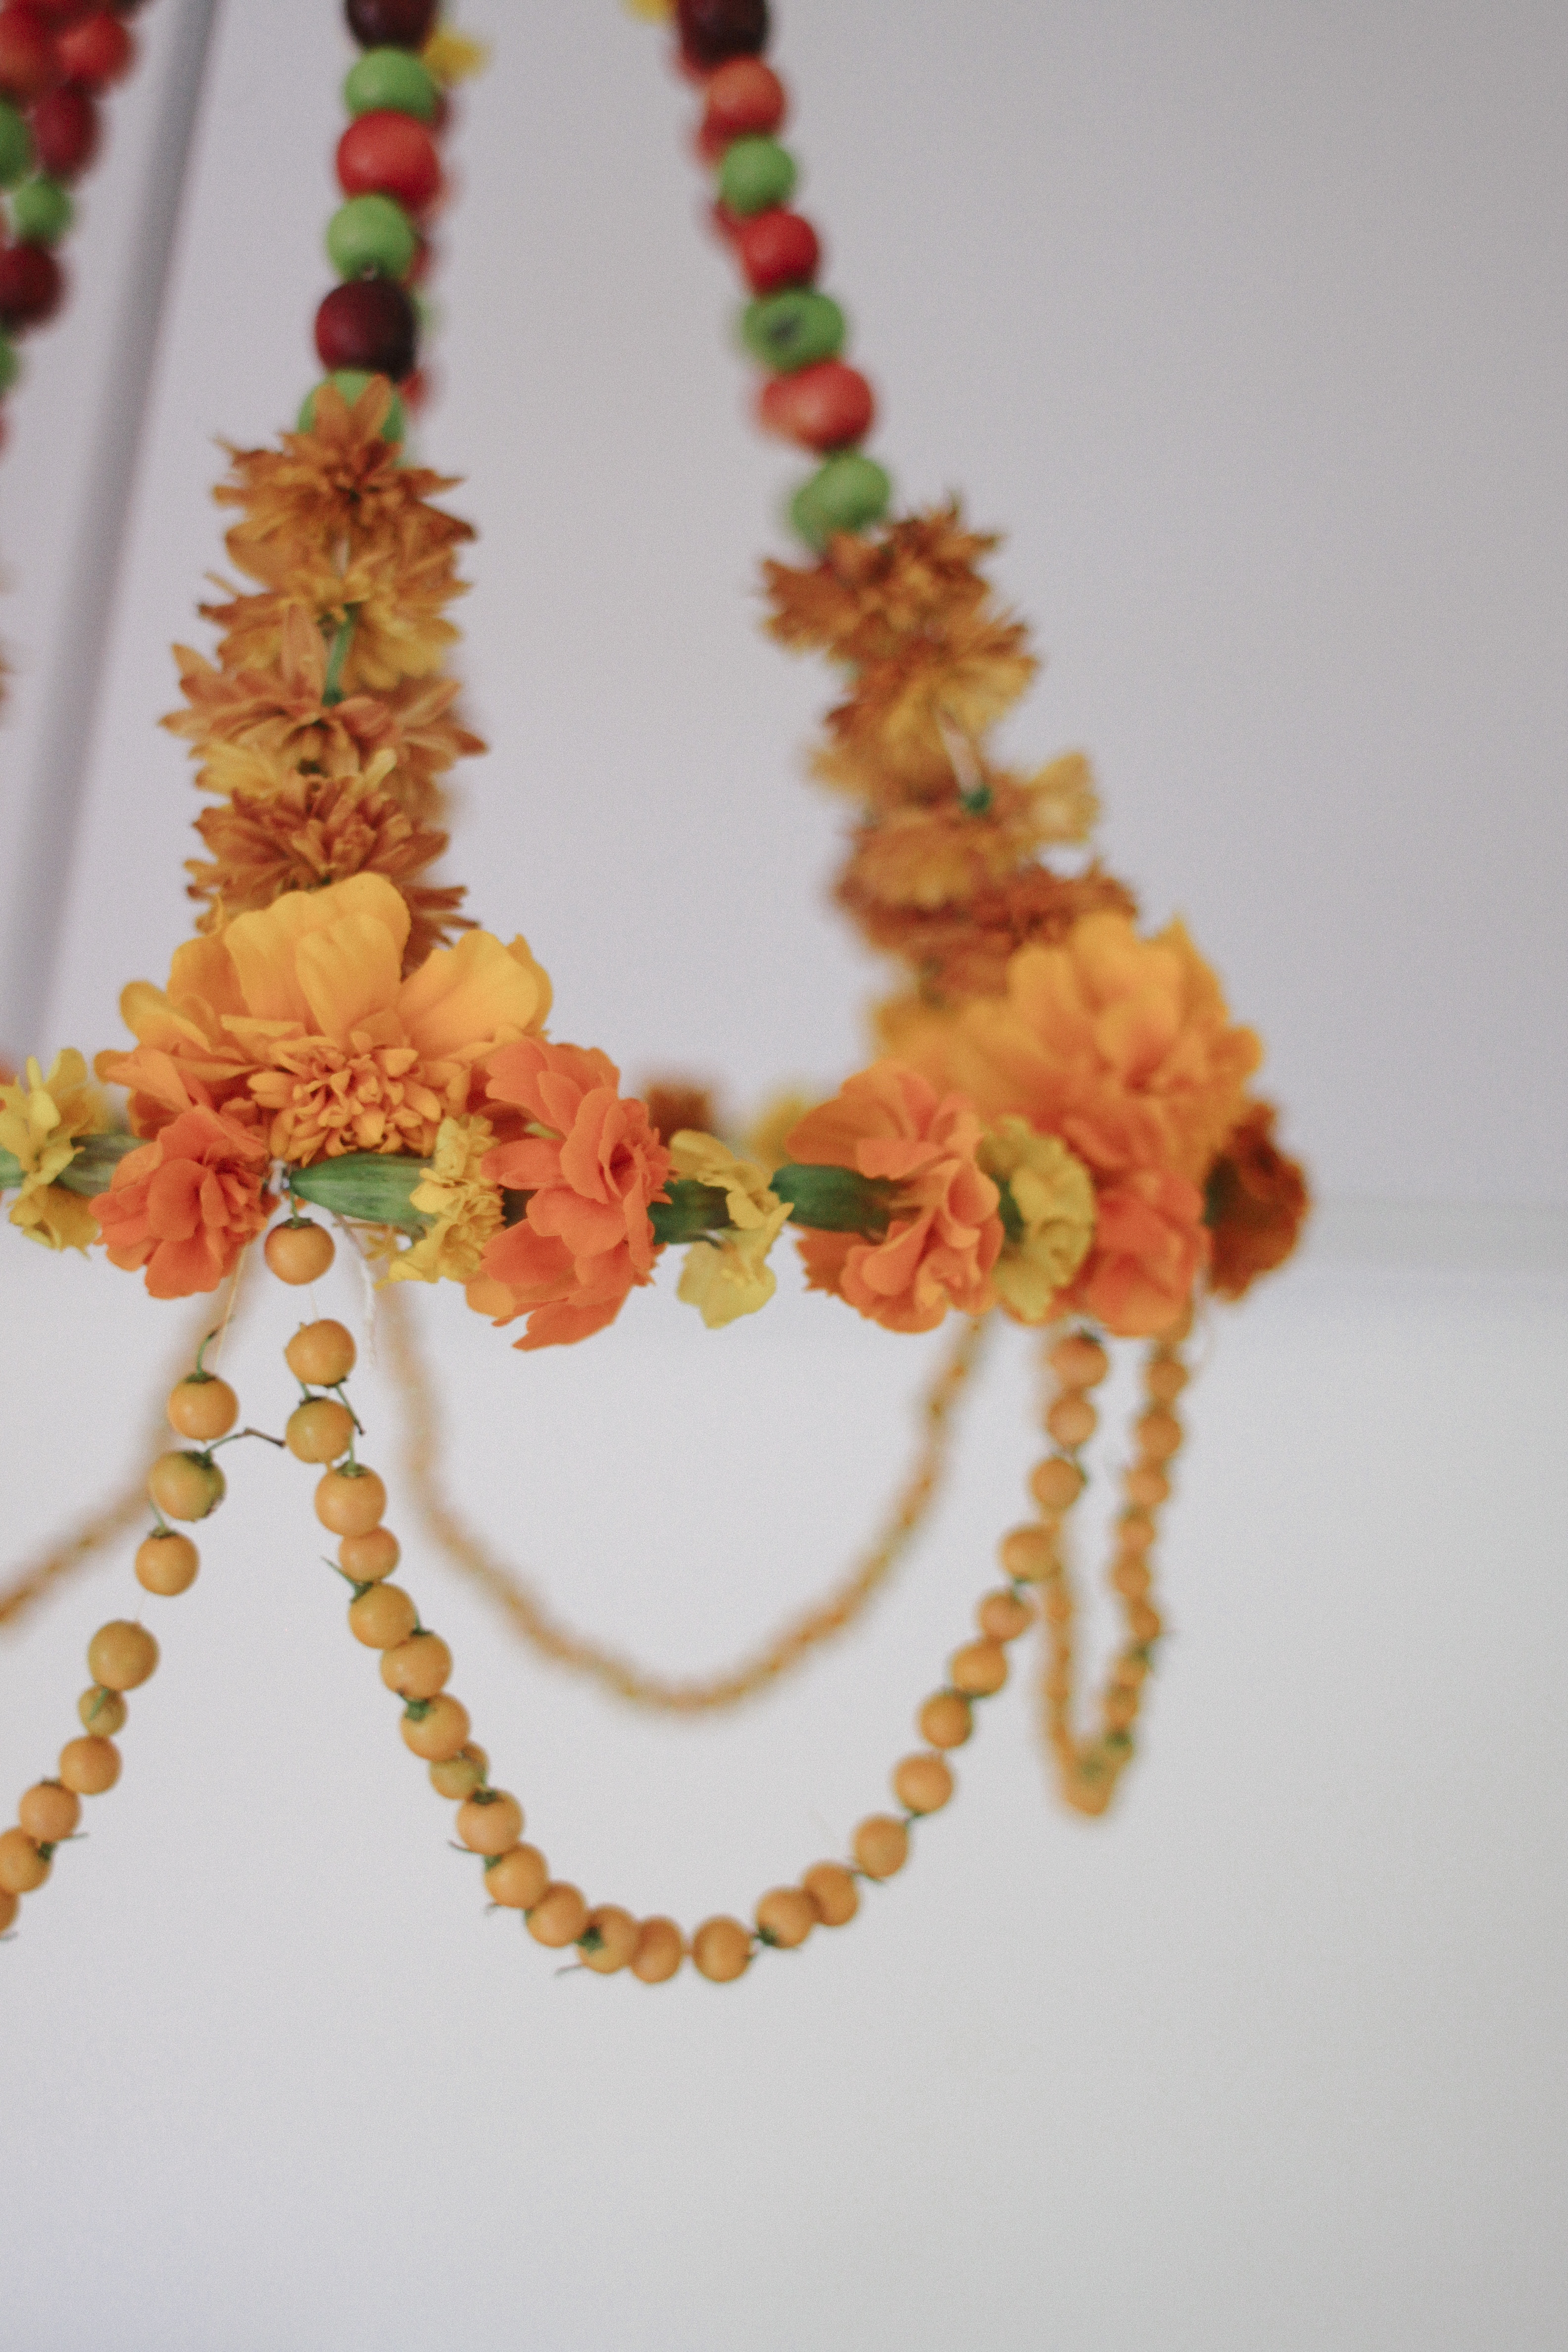
1. I started with a sturdy round wire base. It was important to have a good strong wire circle as foundation as all the rest of the pajaki works of it. It needs be perfectly round and support the weight of the berries, which can be surprisingly heavy. I had a wire circle on hand, and I also had the idea of I using part of an old stained lamp shade. The wire circle was open ended so I was able to thread marigolds onto the wire circle.
2. Thread flowers onto/around the wire circle. Marigolds work very well. Carnations would too. I would love to do a more dramatic version with carnations or other such plump multi petal flowers. I generally don’t buy flowers for projects, just forage and gather seasonal goodness from my garden and the woods, so will stay content until I can grow masses of other sorts of flowers! You need to use a hardy flower for the threading onto thick wire.
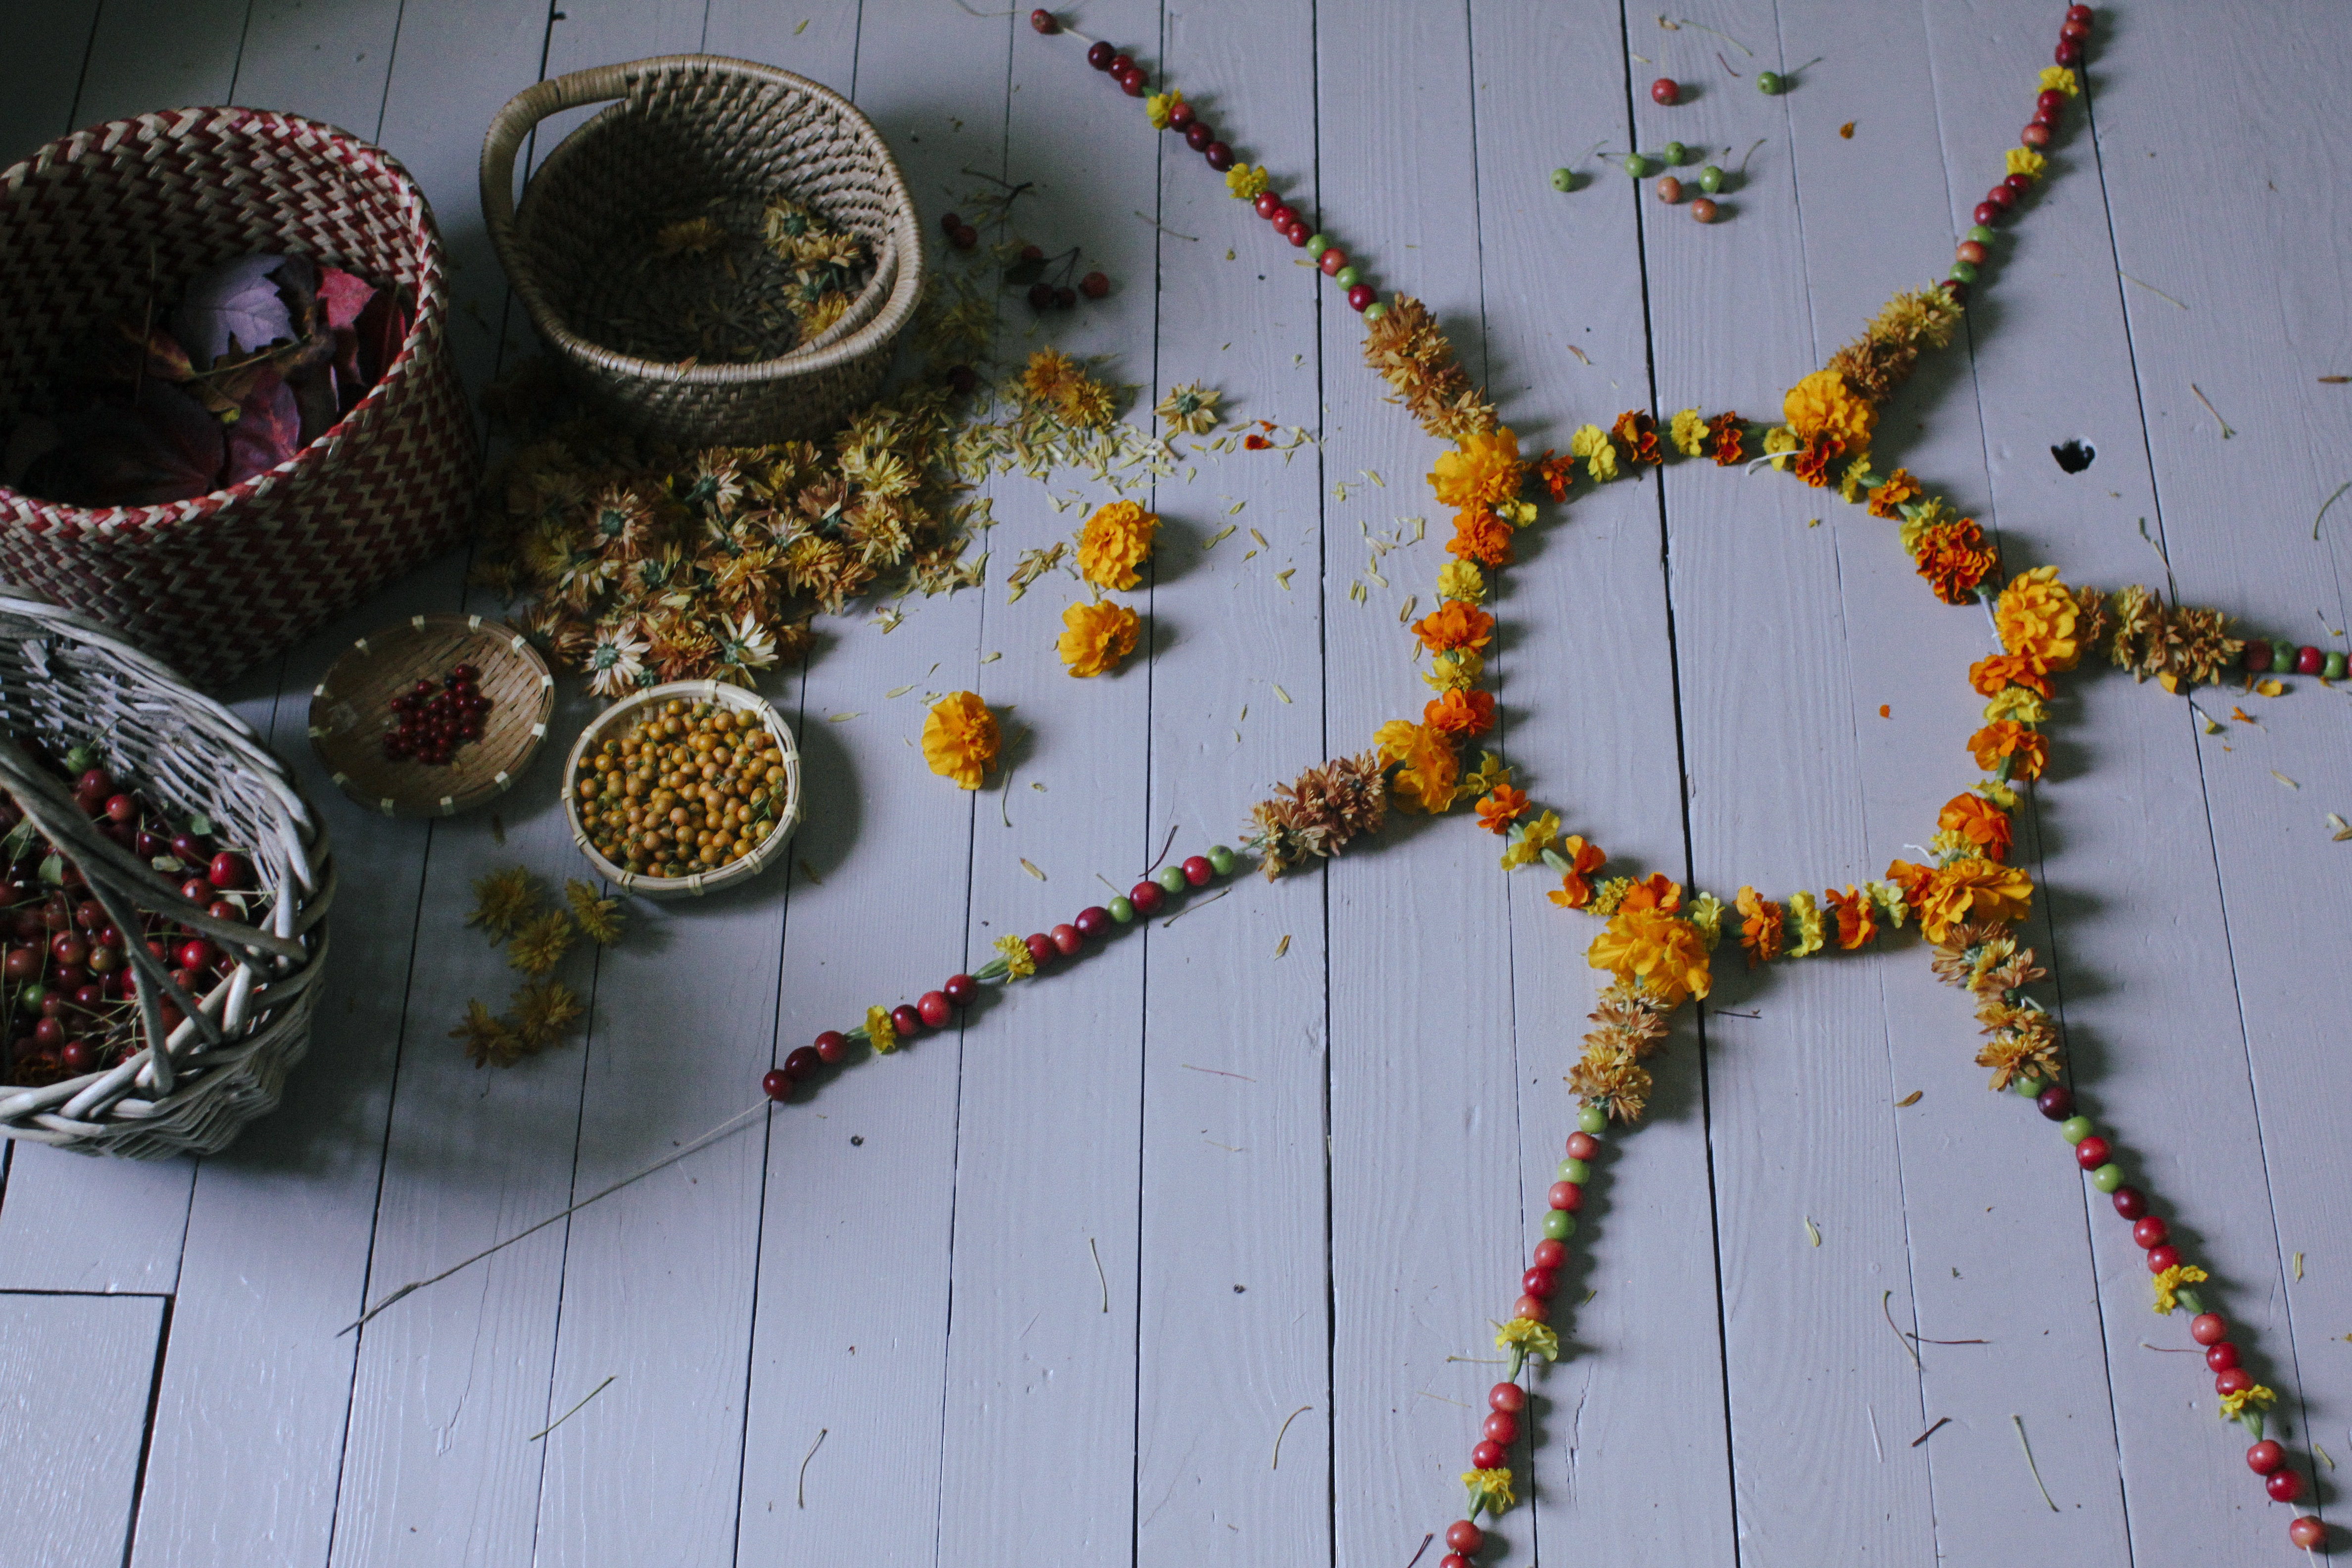
3. Decide how many hanging pieces you want, I chose and even number as it made it simple to space them evenly around the circle base. I went with six as it seemed like a nice proportion for the size of the wire circle I was working with. In this case, I cut six even lengths of household string. Once again, based the lengths on proportions.
4. Tie each piece of string, evenly spaced to the wire/flower circle.
5. Start threading on flowers, berries, crab apples, and whatever else you have collected on to each string. I threaded a pattern, and then made sure I repeated the pattern exactly the same on each string. I used various sewing needles, depending on what I was threading.
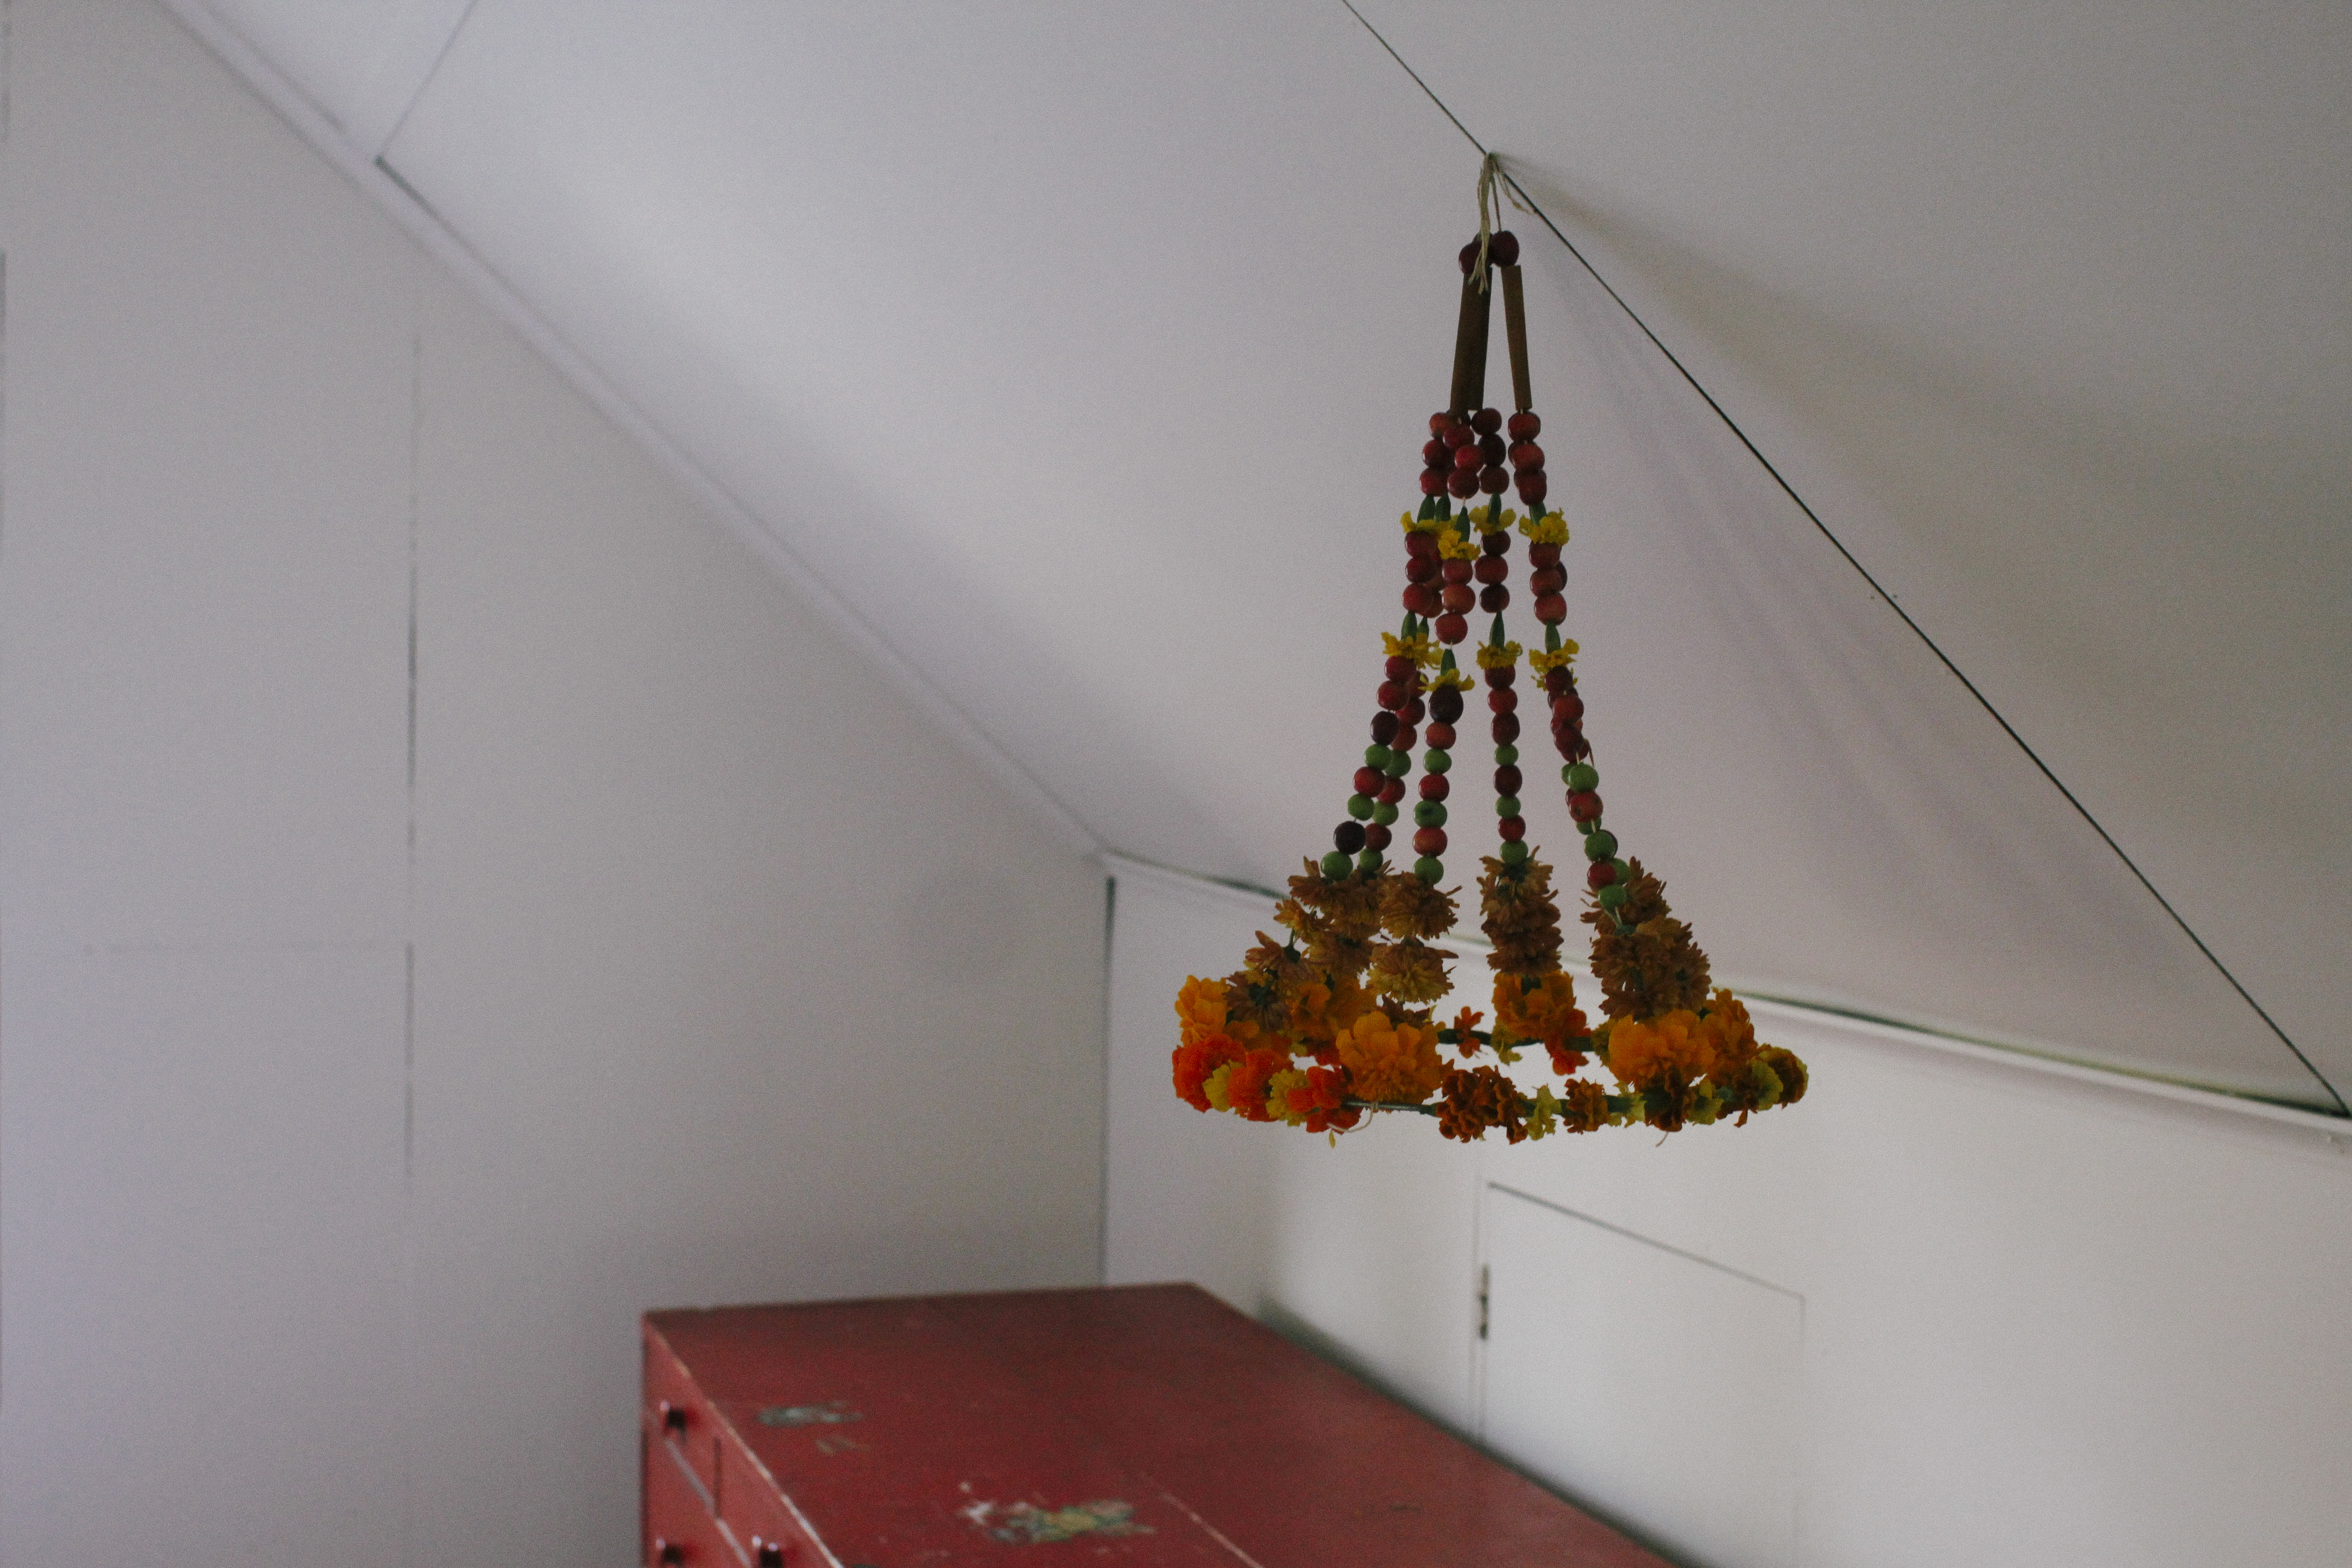
6. Once all the strings were strung, I paired them off, by threading two strings through a cinnamon stick, which meant I ended up with three cinnamon sticks at the top. This was very helpful in getting the circle to hang straight, at the right angle. Three pairs was easier to handle then six separate strings.
7. Tie all the strings together in a knot. Once you have tied all the string together, you can now hang it, and work on it while it is hanging. I found this encouraging and it inspired me to keep threading berries (which is time-consuming, and might hurt your fingers!)
8. Now it is time to make the bottom berry garland. I threaded one very very long strand of berries, then simply looped it around evenly, hanging it over and around each sting to from a garland. This took a little fiddling to get each scallop even, and you could be very precise about it and measure it and divided it, but I just went by feel… At this point I considered doing another garland on the bottom but I was running out of light to photograph it, so had to stop there… and then there you have it, a fresh flower pajaki.

Beautiful Kirsten. Very beautiful. Today we accomplish some craft with nuts and leaves, and this might be where we draw our inspiration.
Thank you!
Hello Kirsten! I love reading your blogs. And I love the red hat your daughter wears in the last picture. Did you knit it? I’d love to knit one for my daughter. Thanks.
Hi Kathy,
That hat is handmade, by a company on etsy called Typically Red. I adore these knits! Thank you.
https://www.etsy.com/shop/typicallyred
Hi, Kirsten,
I come from Poland and I also like this tradition – pająki – very much. It can be used as some inspiration to decorate room, garden etc. in any season. Beautiful photos!